- GitHub
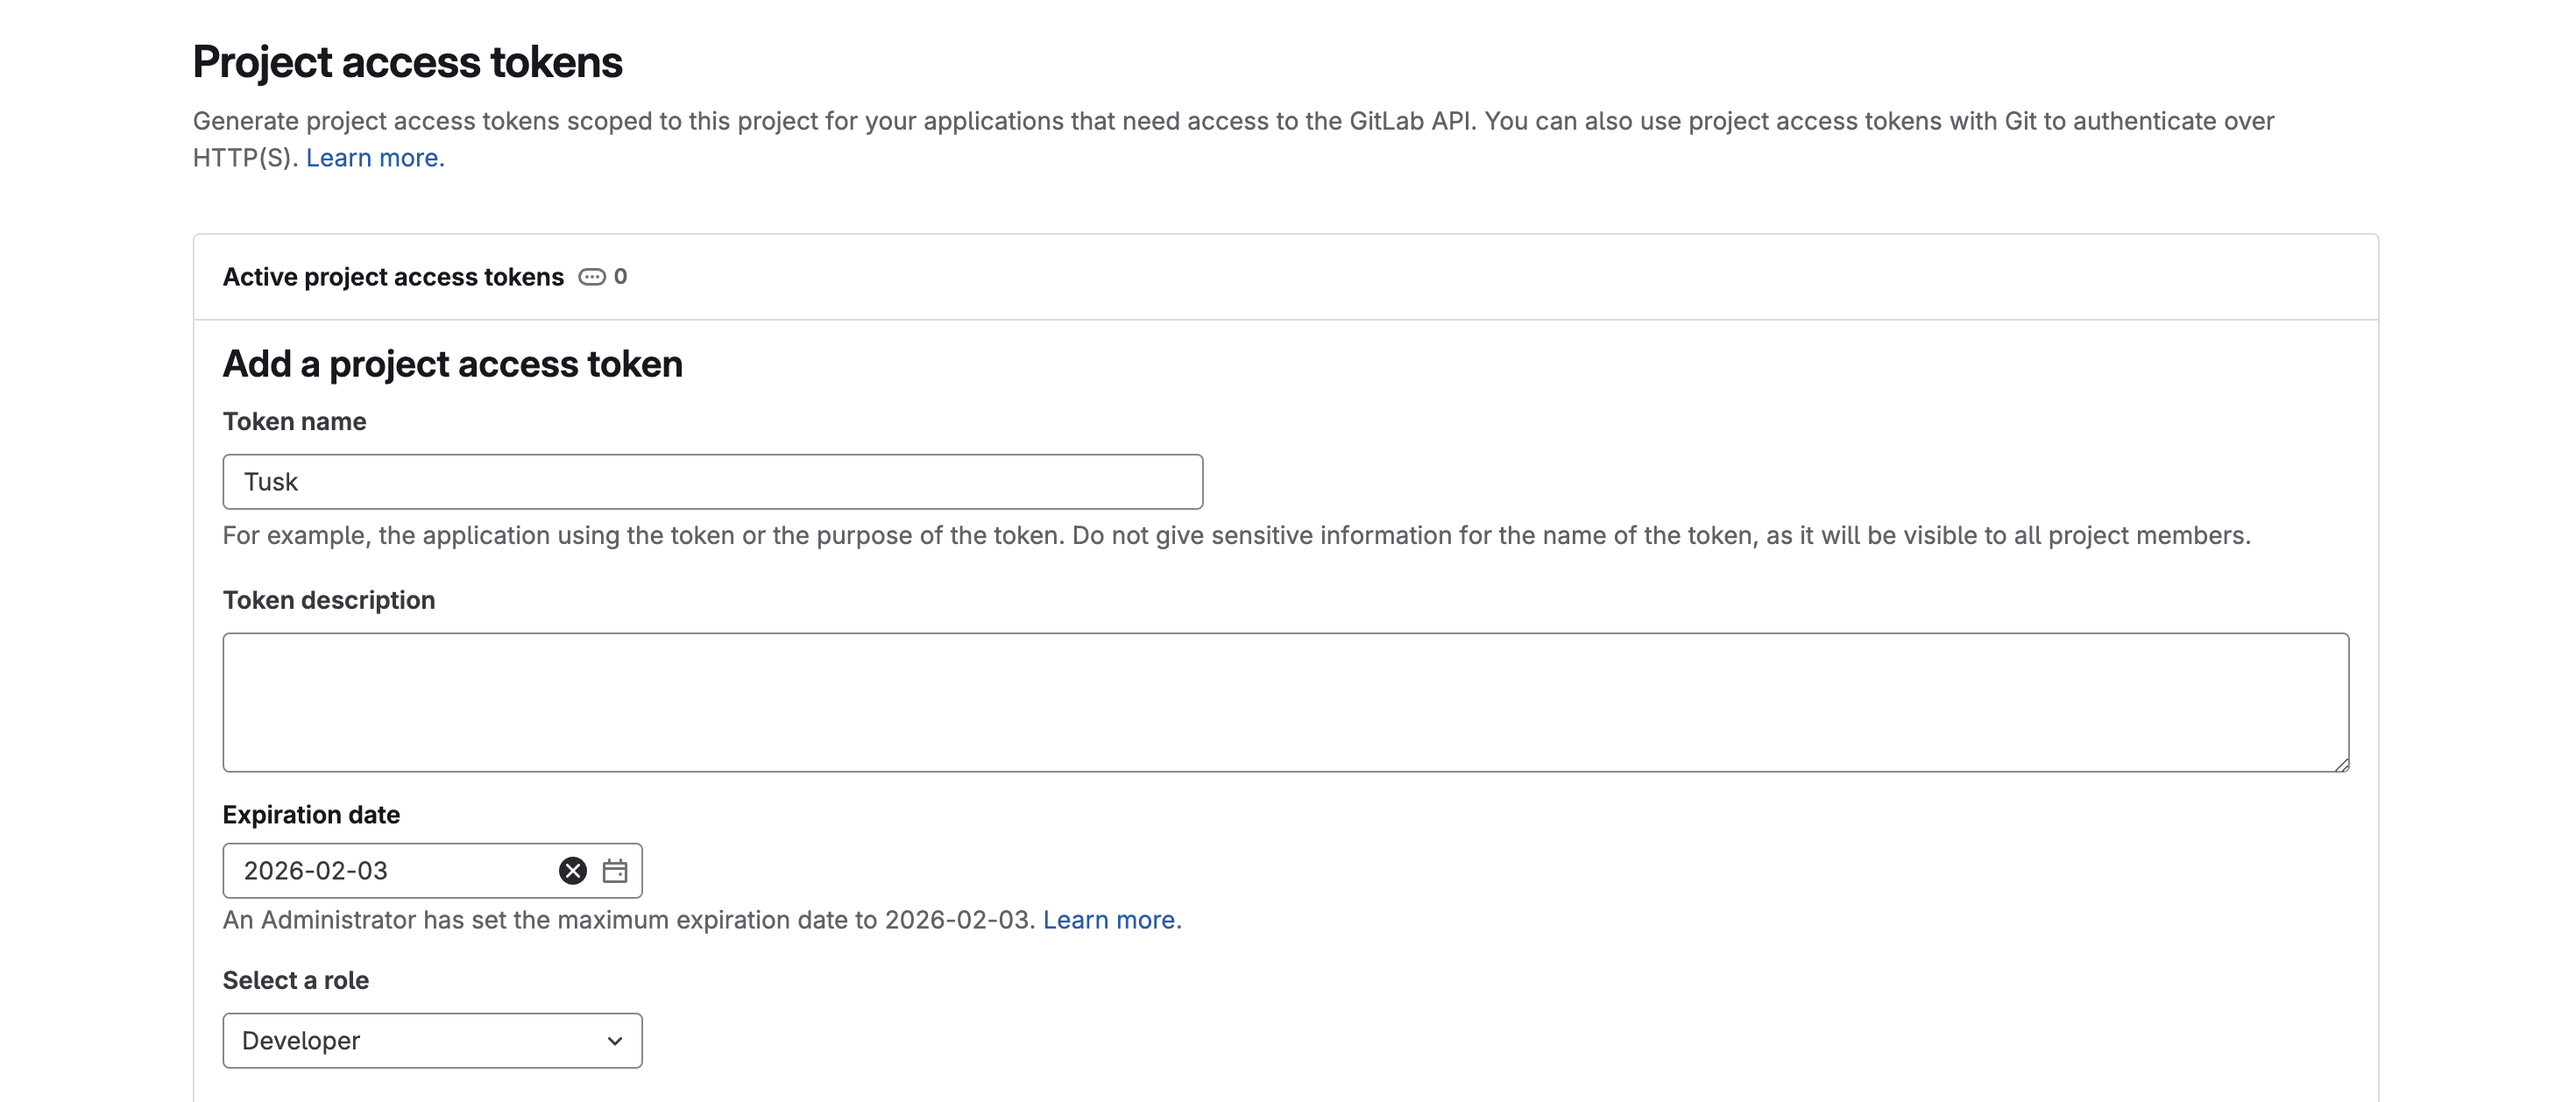
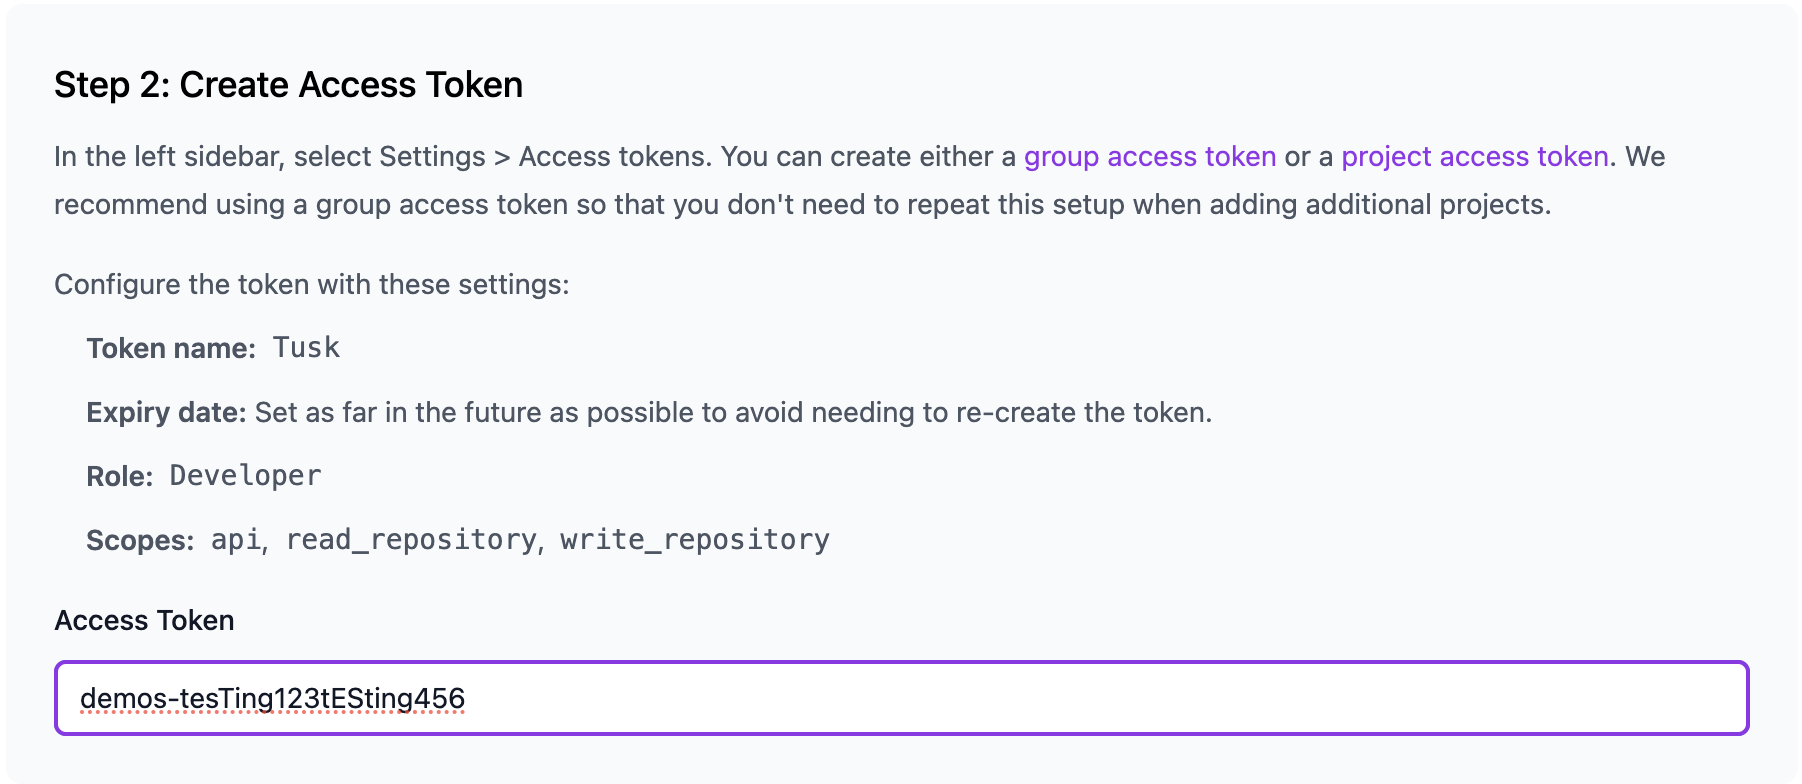
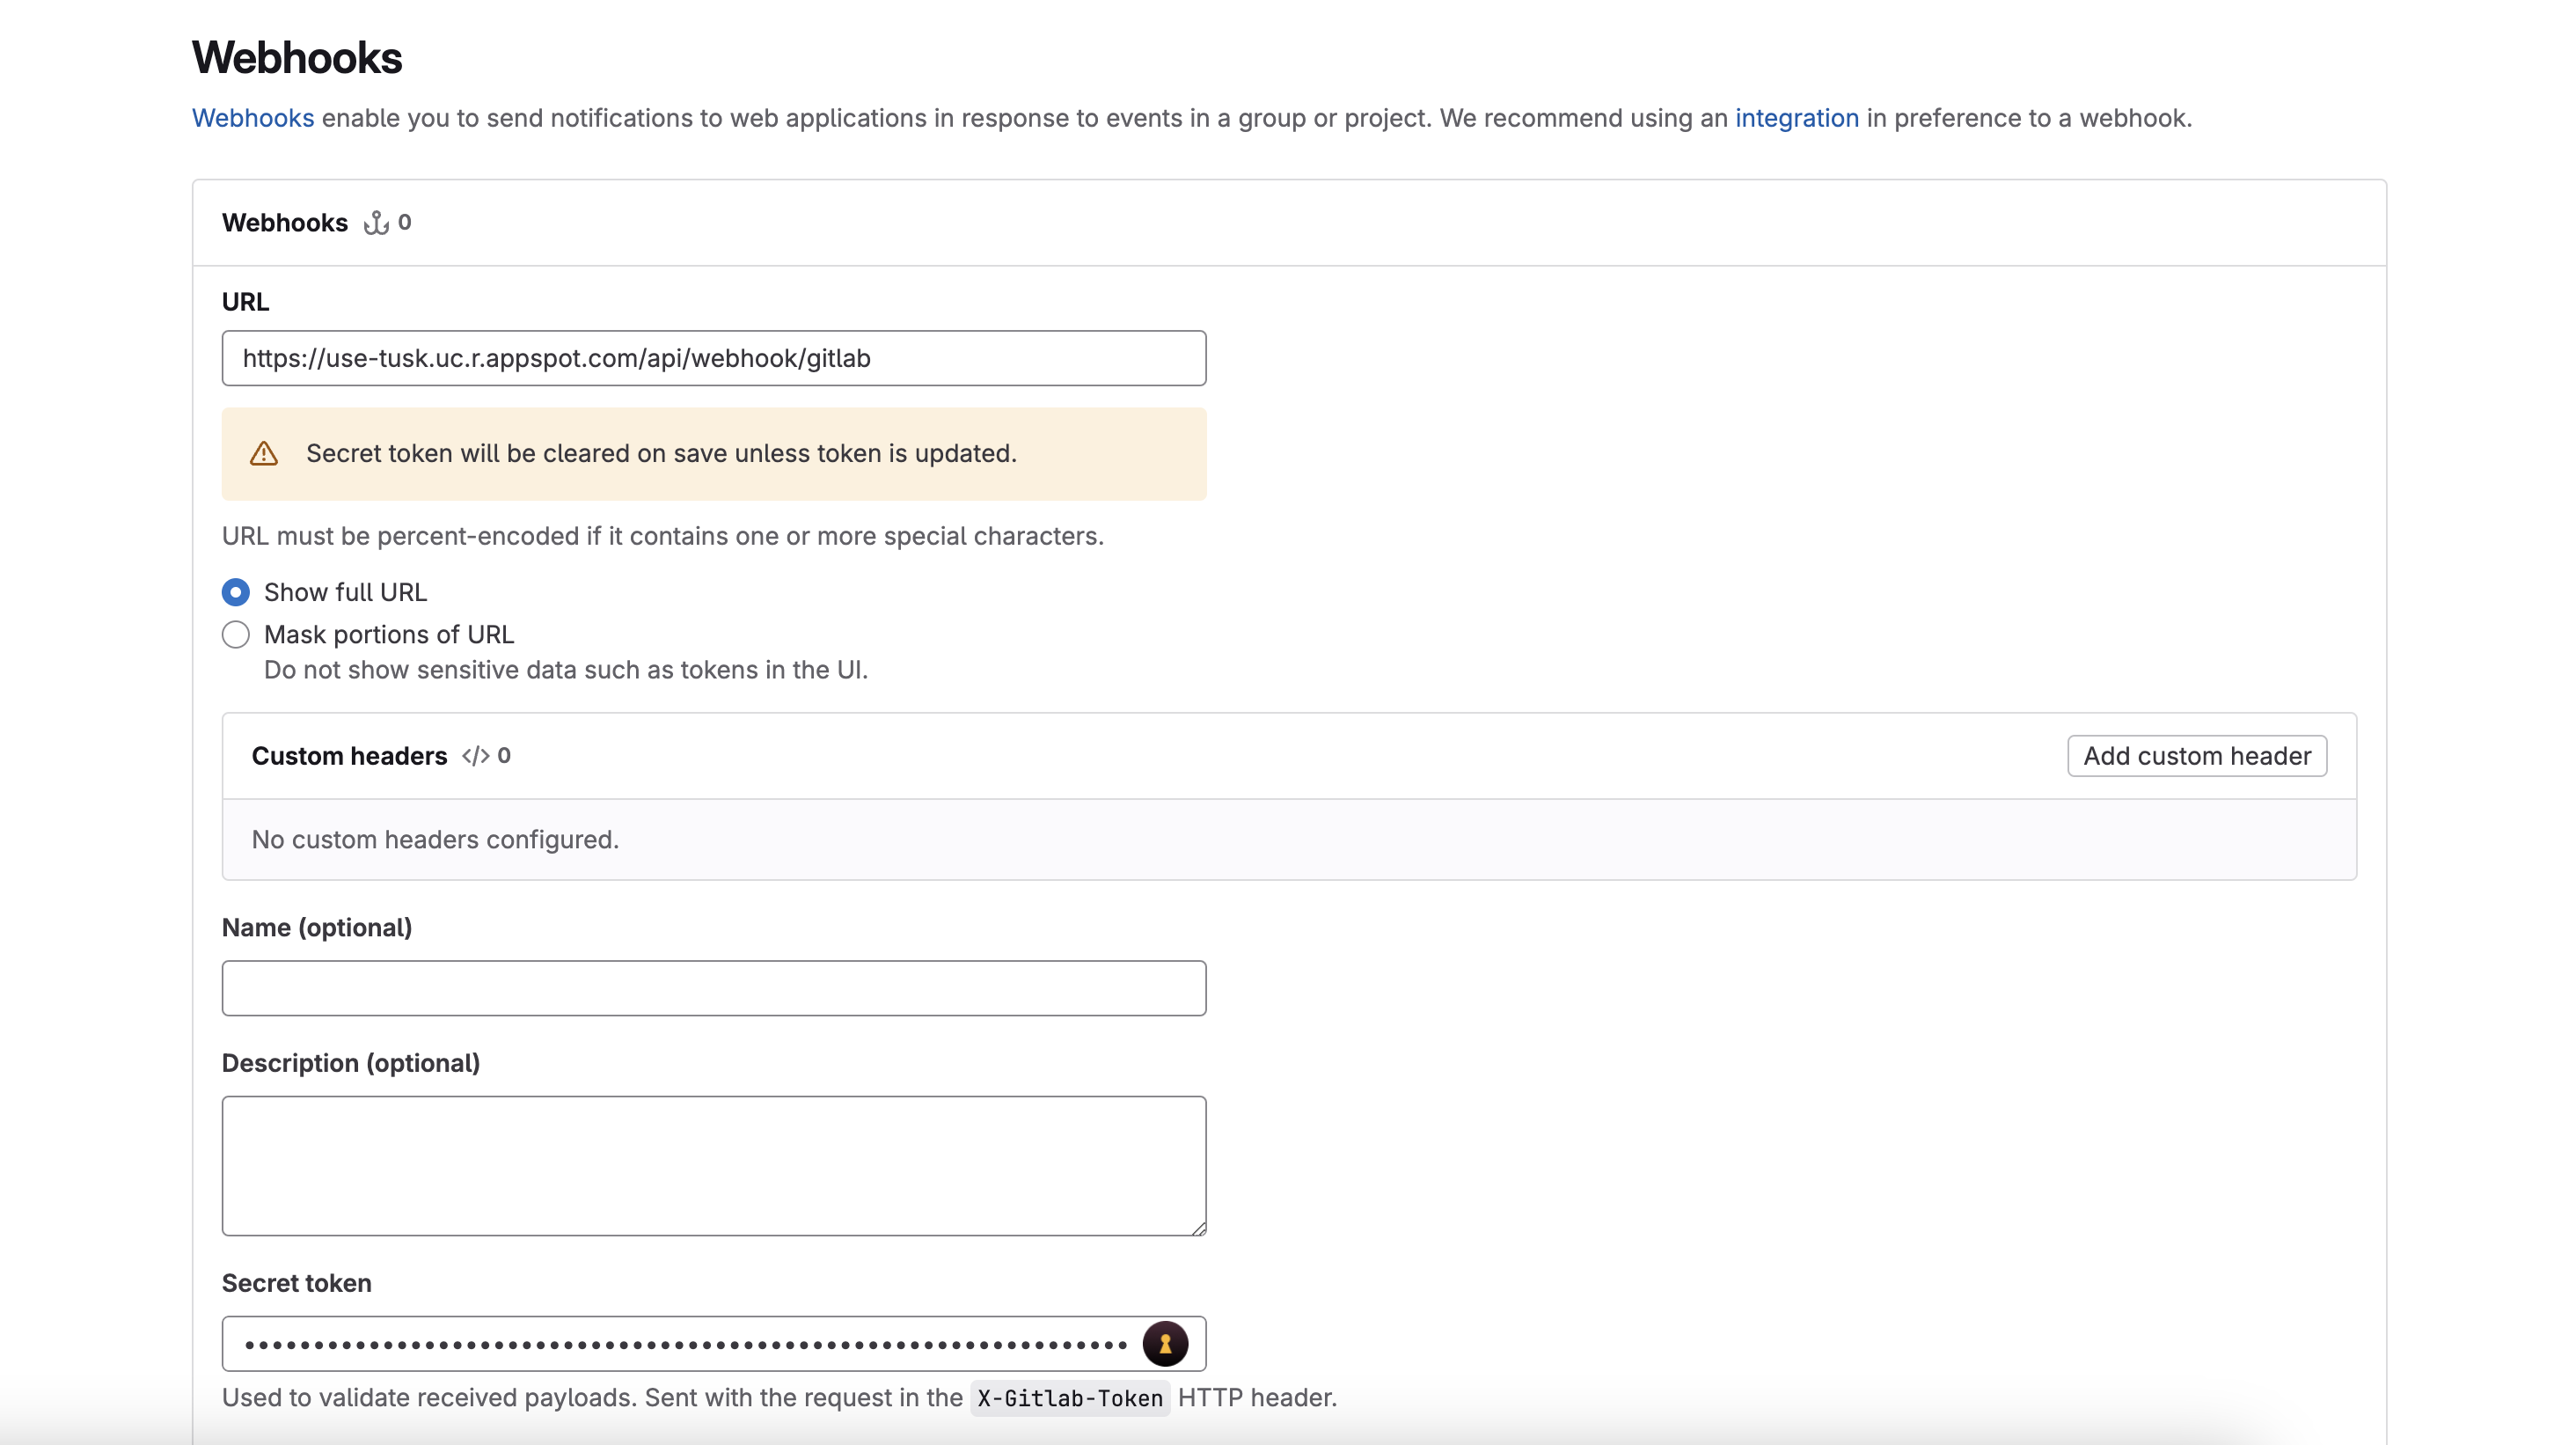
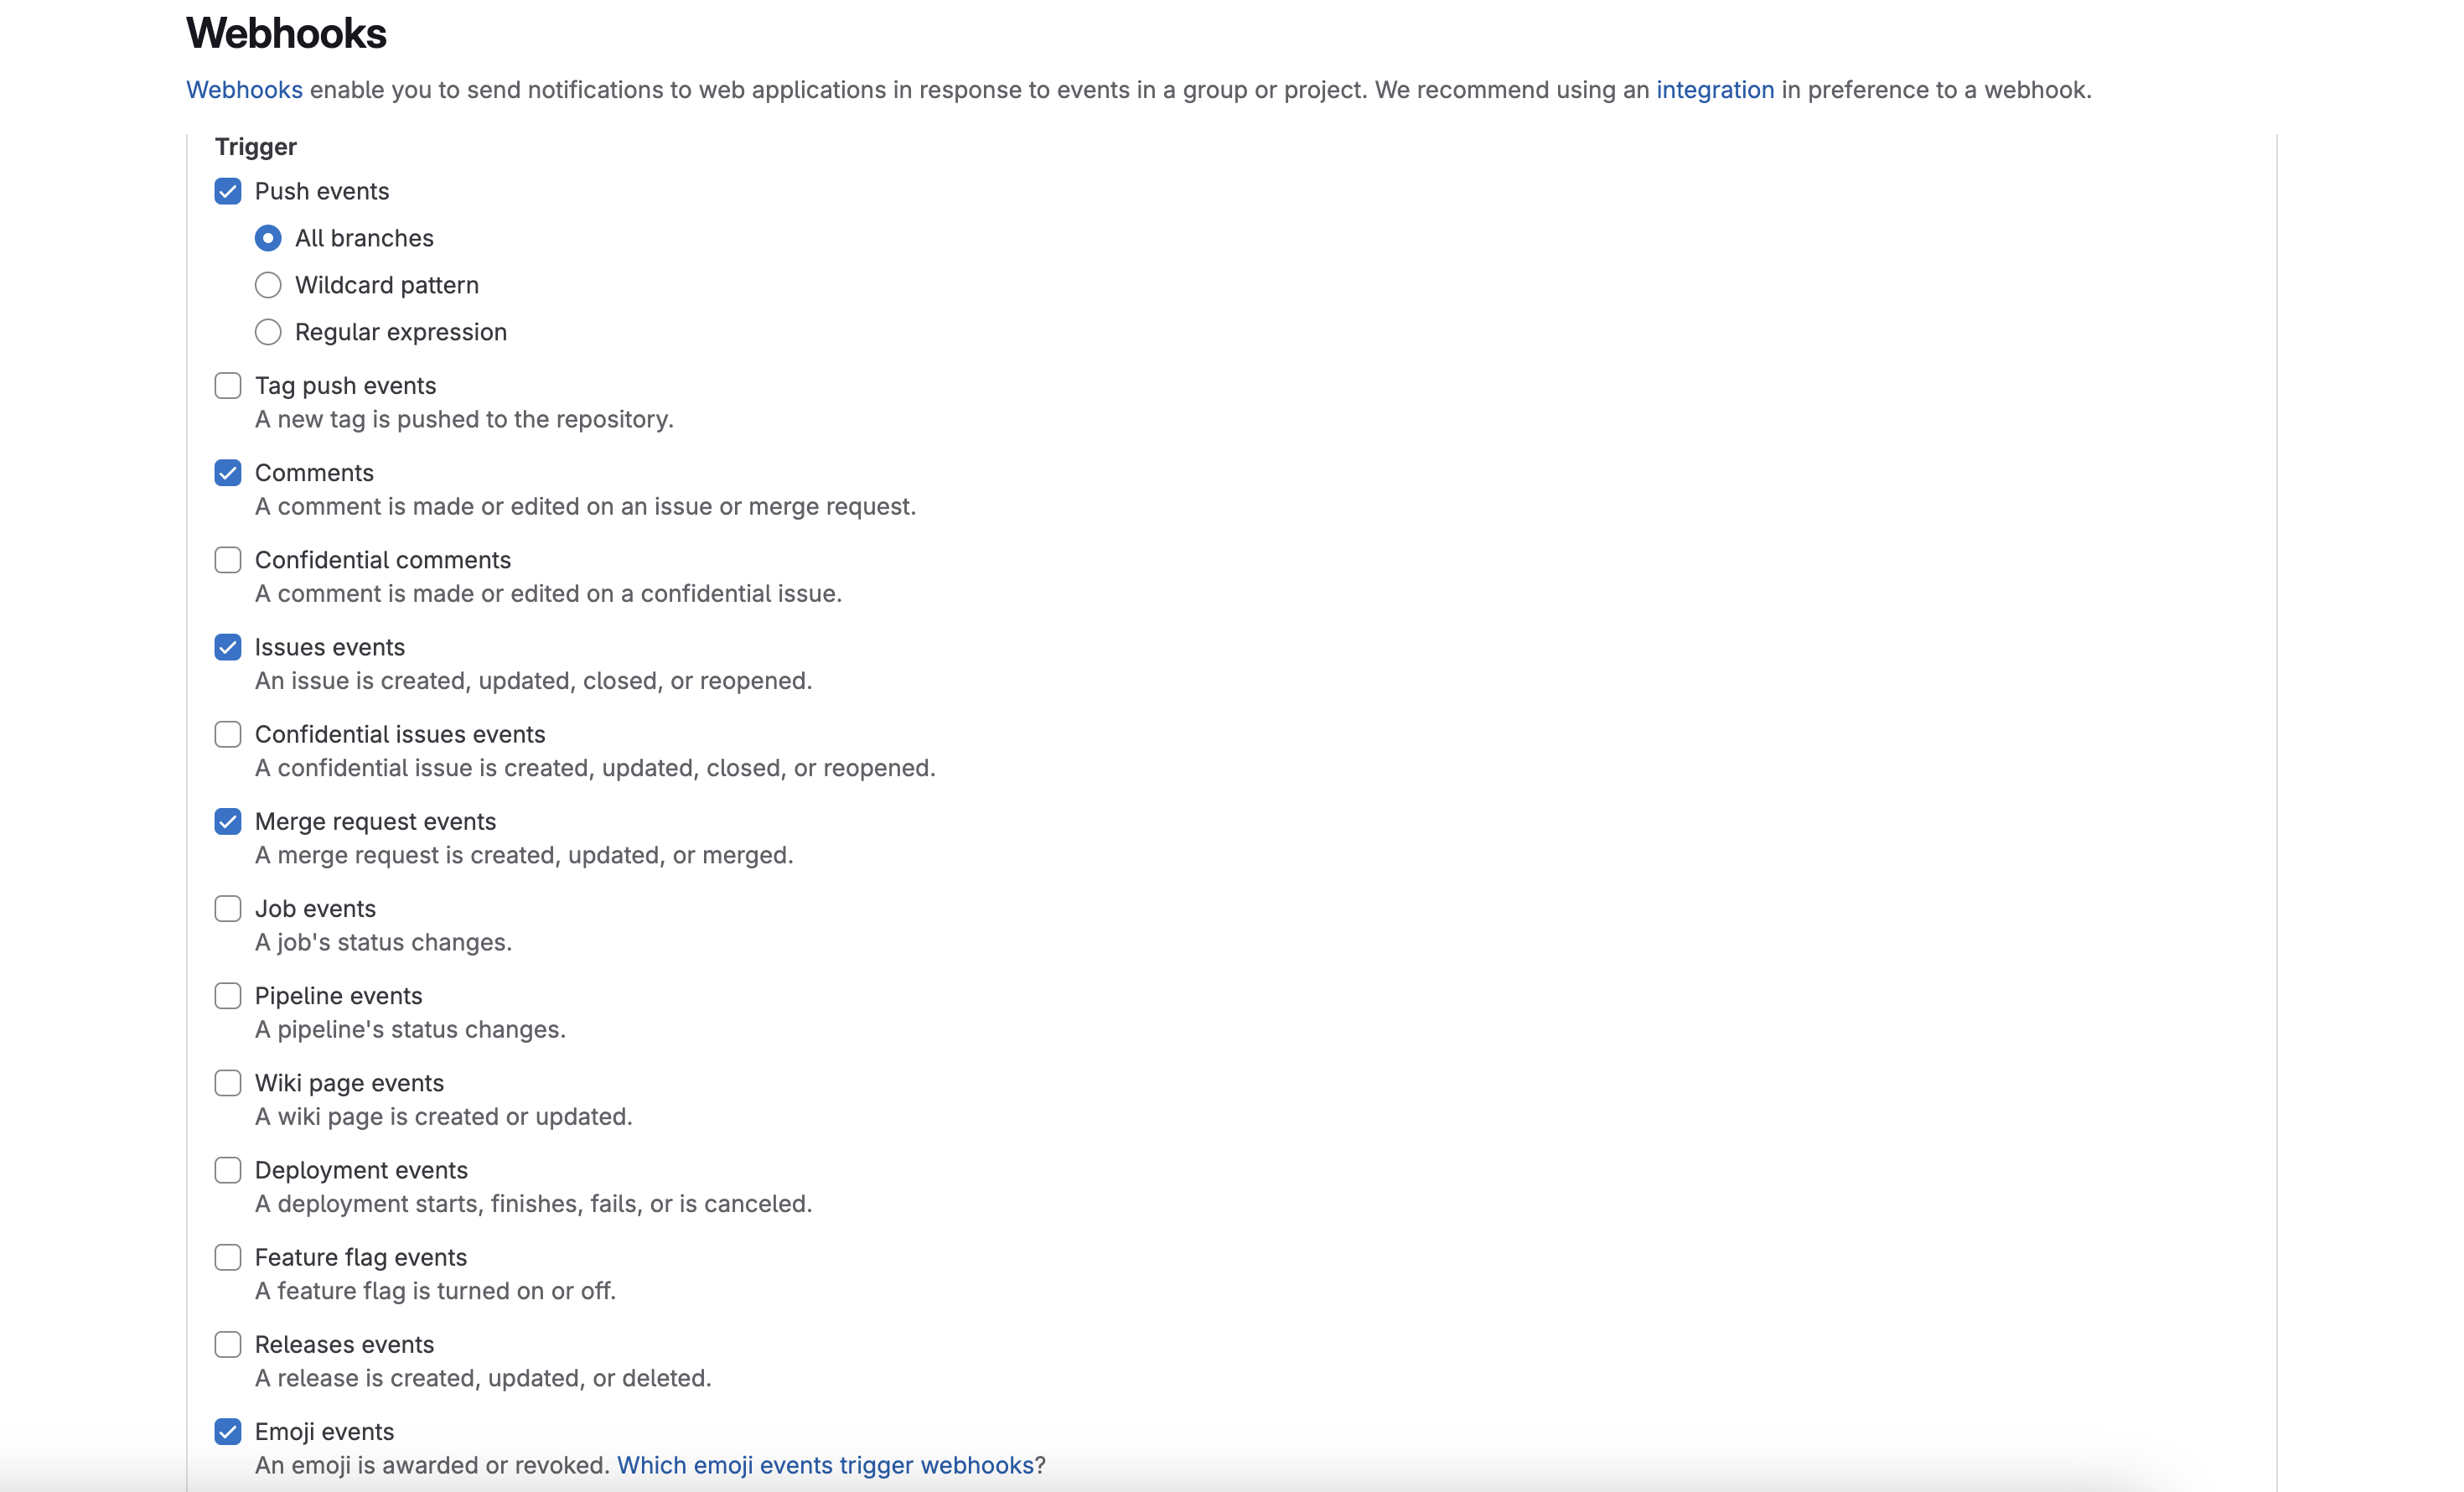
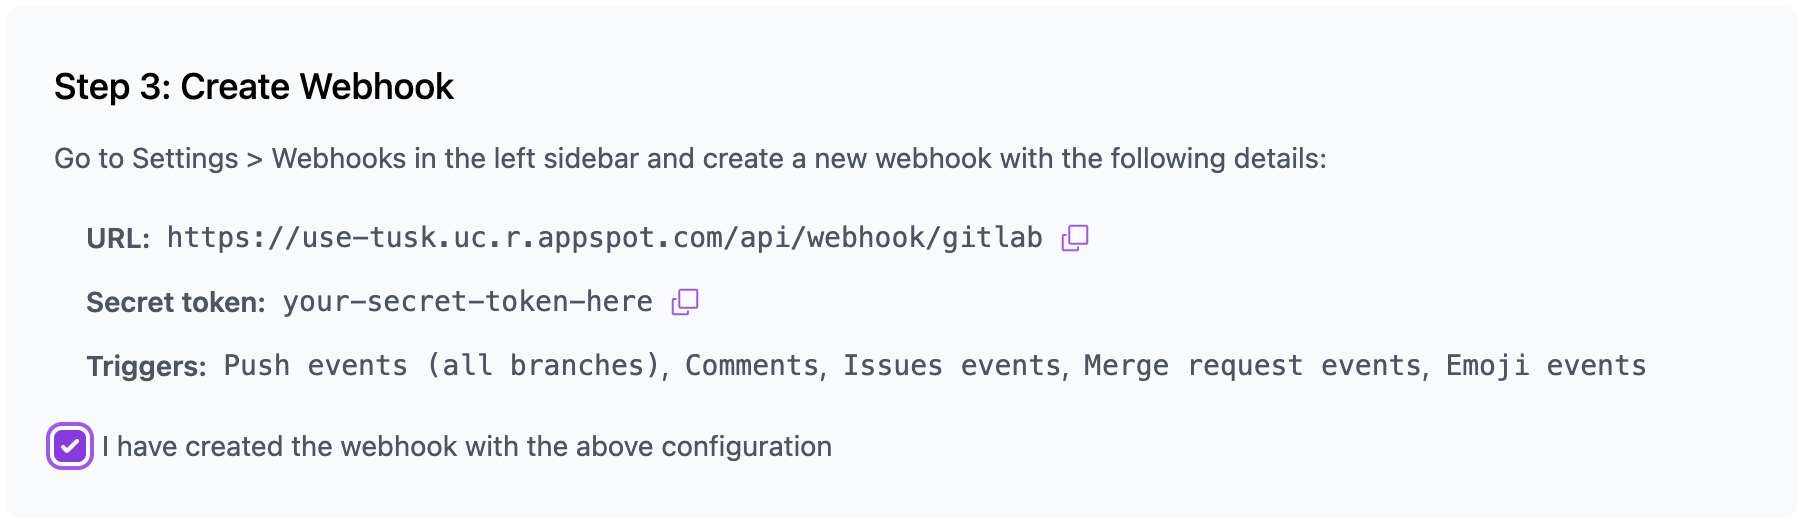
- GitLab
GitHub user permissions to manage external apps in your GitHub organization
Creating an account
Sign up to Tusk with Google, GitHub, GitLab or with email/password. If you create an account with your company’s Google workspace, a Tusk organization for your company will be created. Note: Any team member who signs up via Google with your company’s email domain, or with GitHub/GitLab and who are in your GitHub/GitLab organization will automatically be added to the Tusk company organization.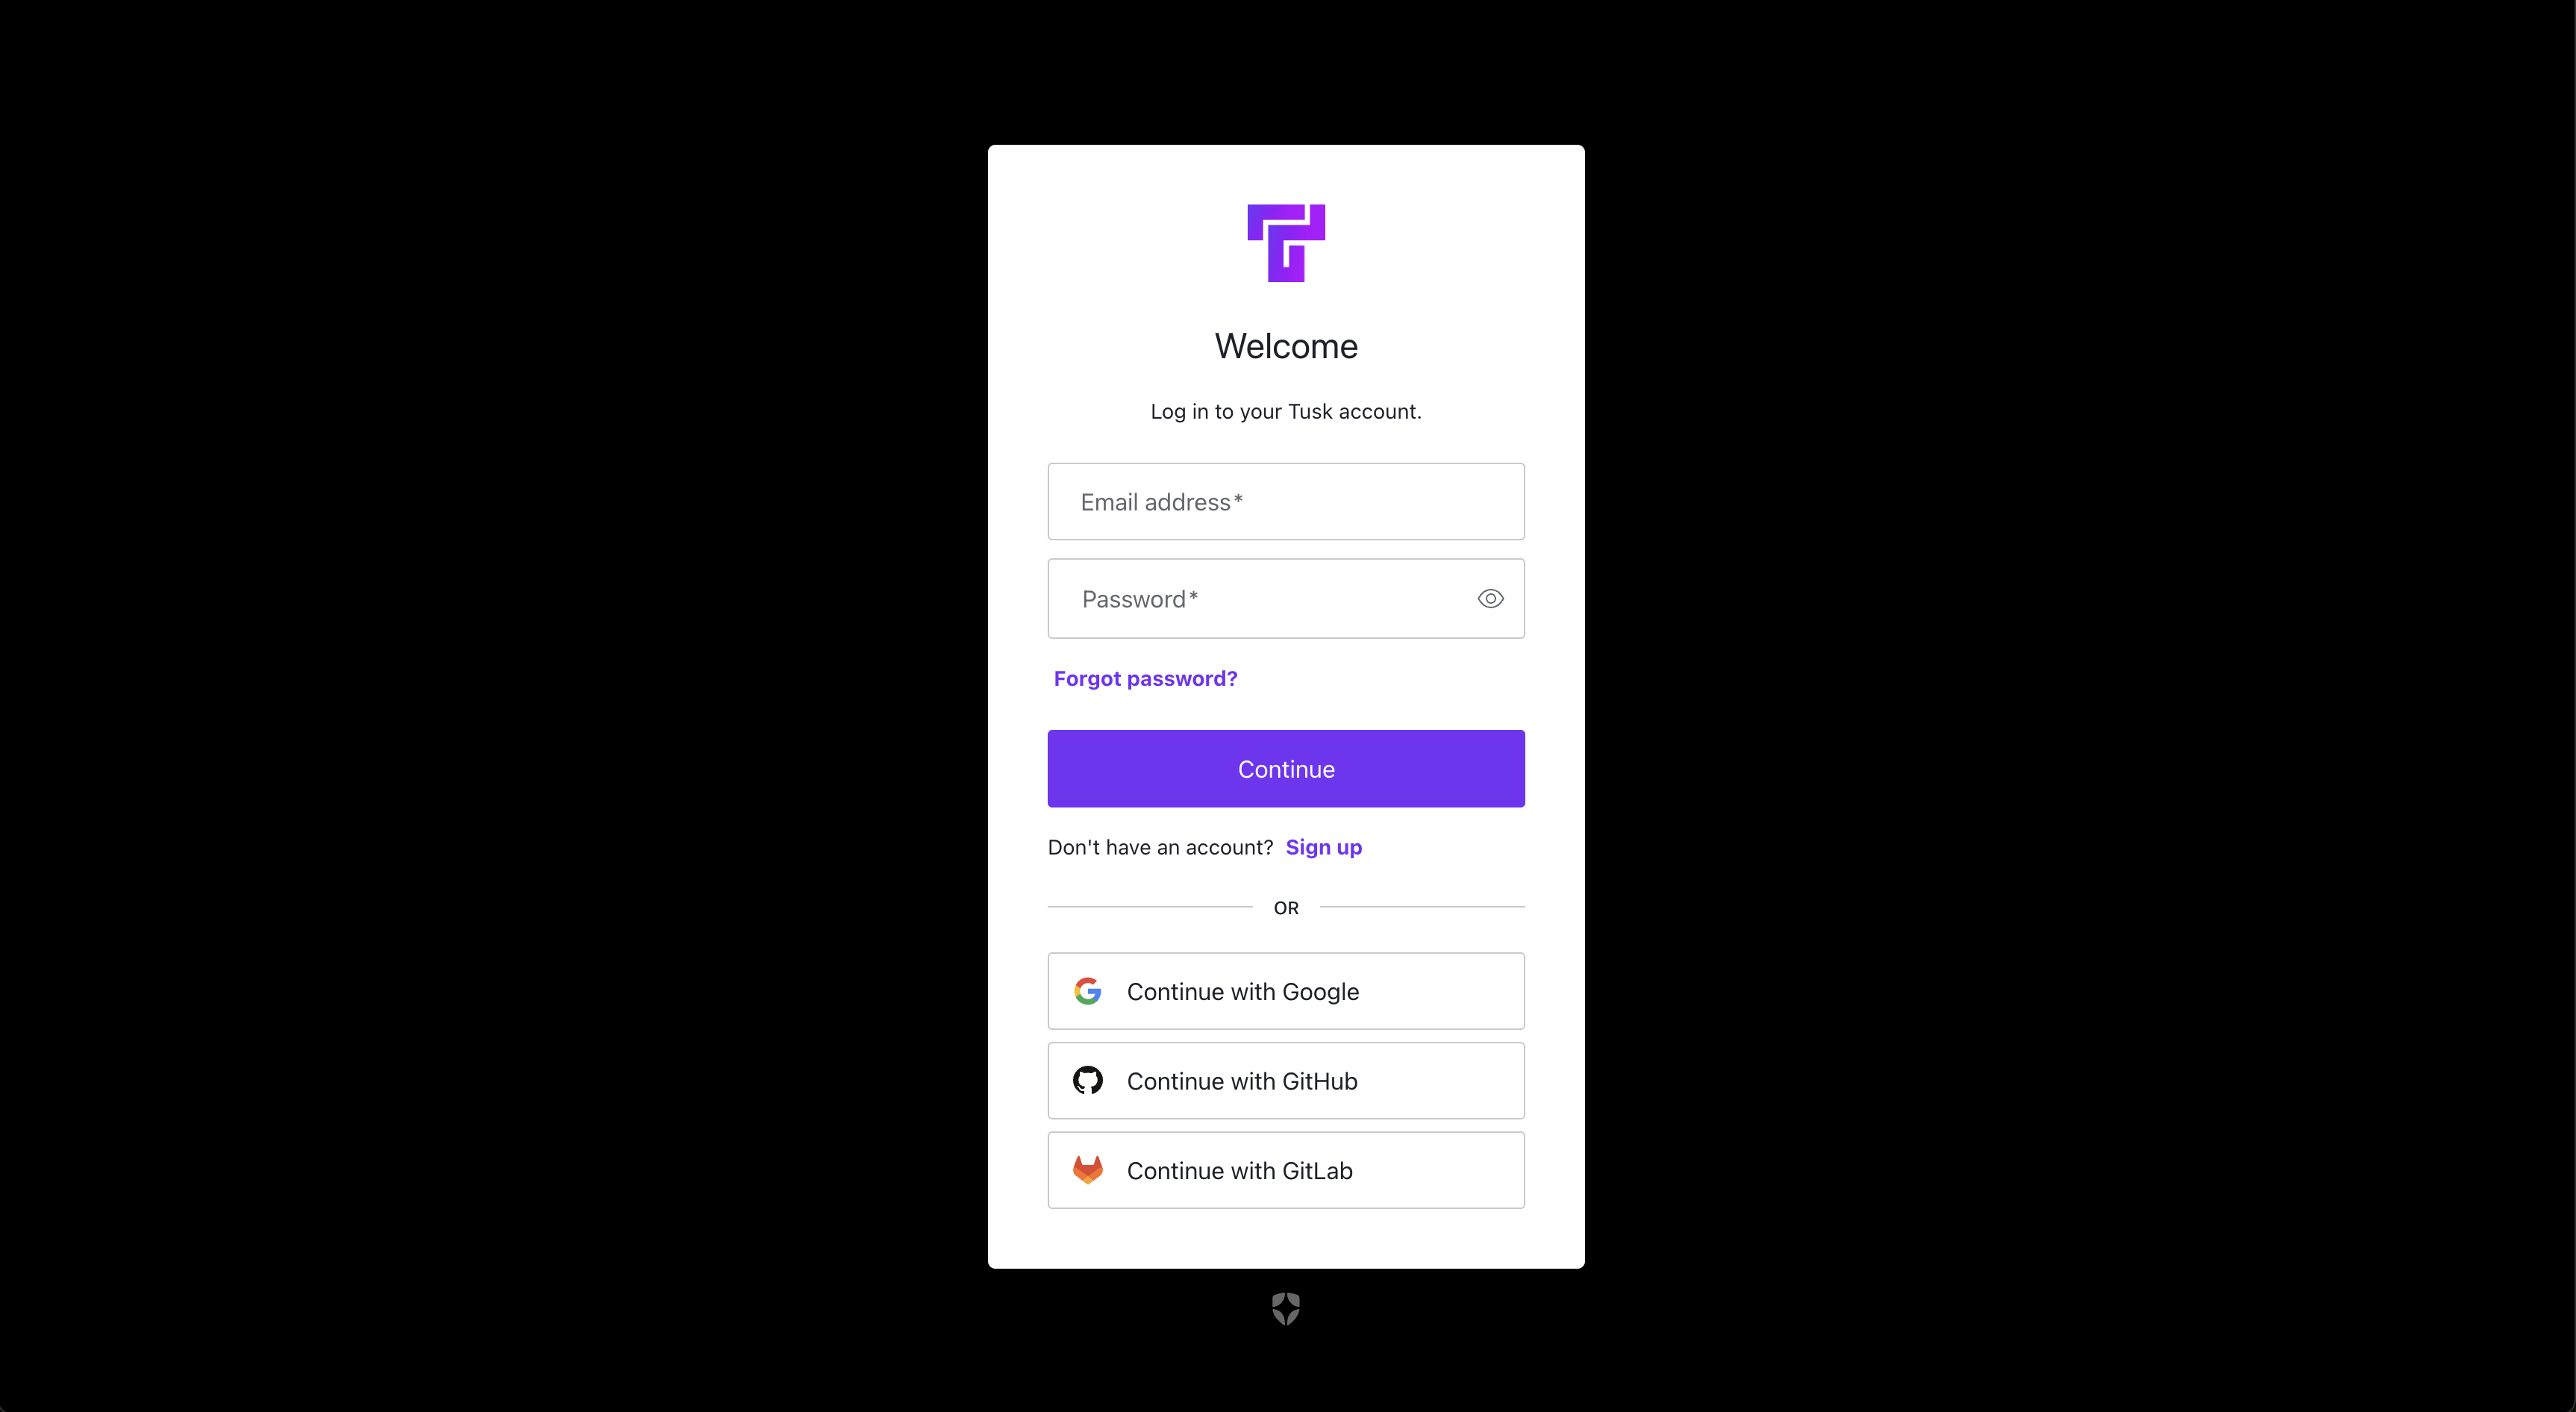
Connect version control platform
- Connect GitHub
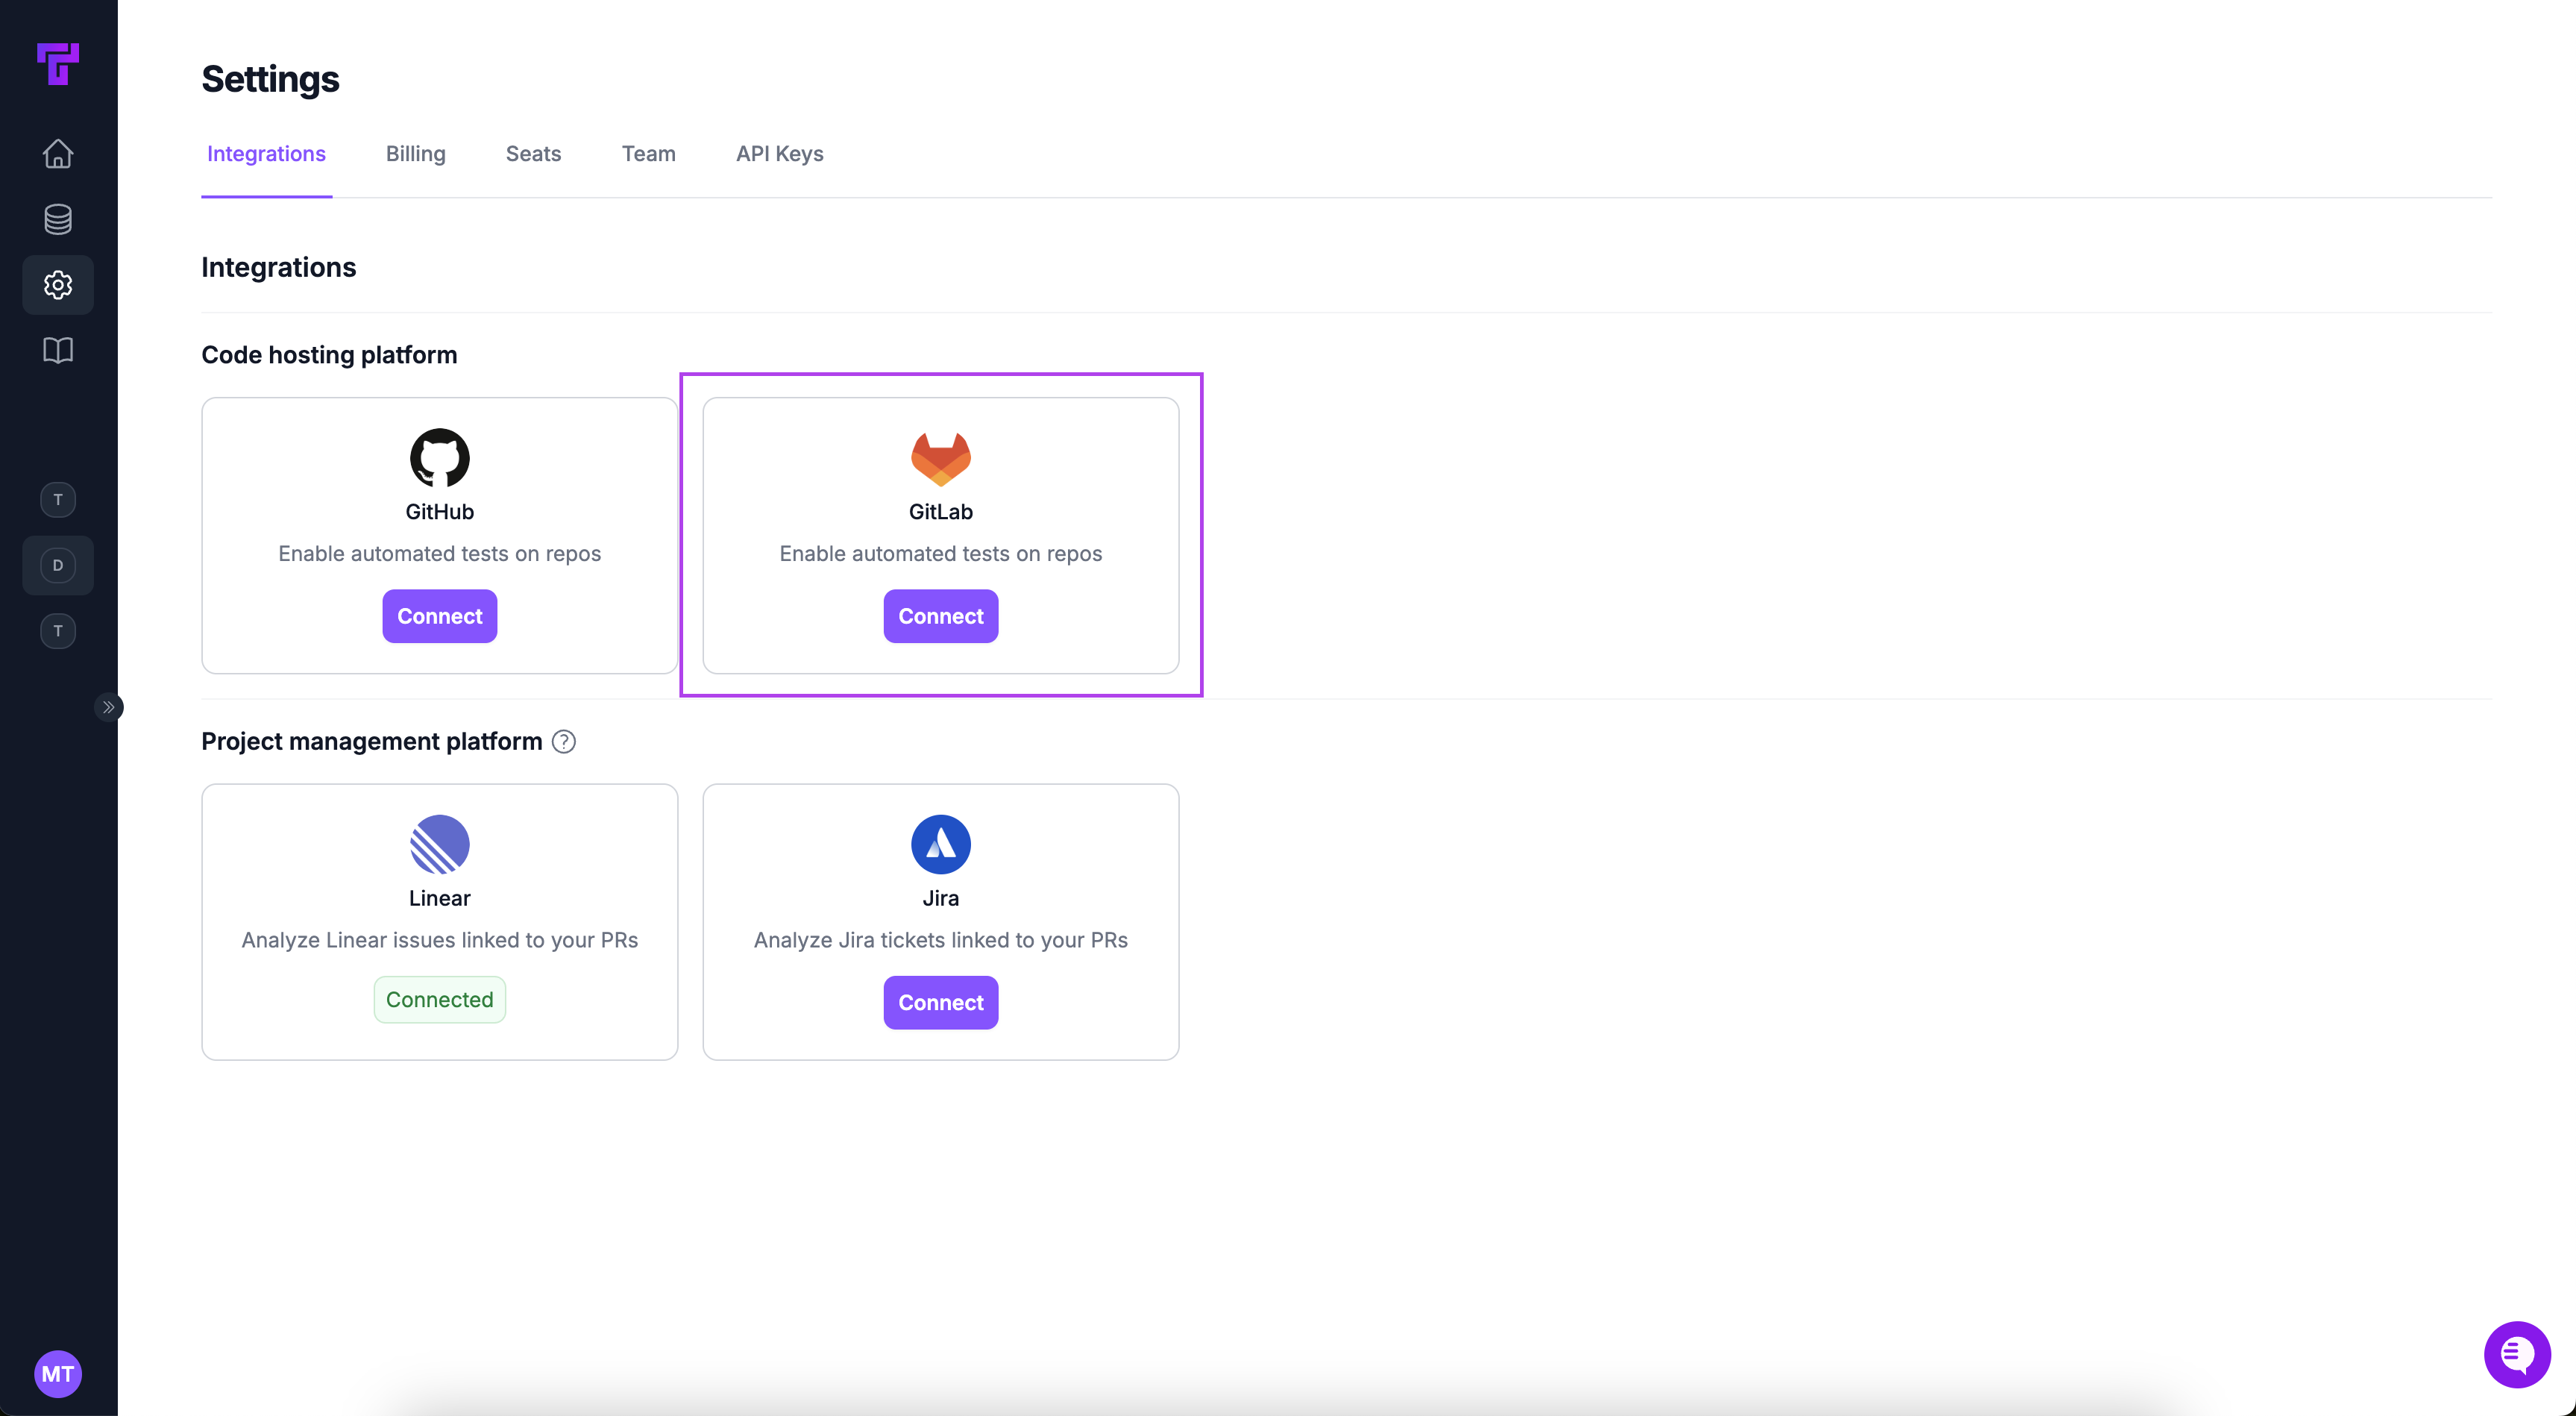
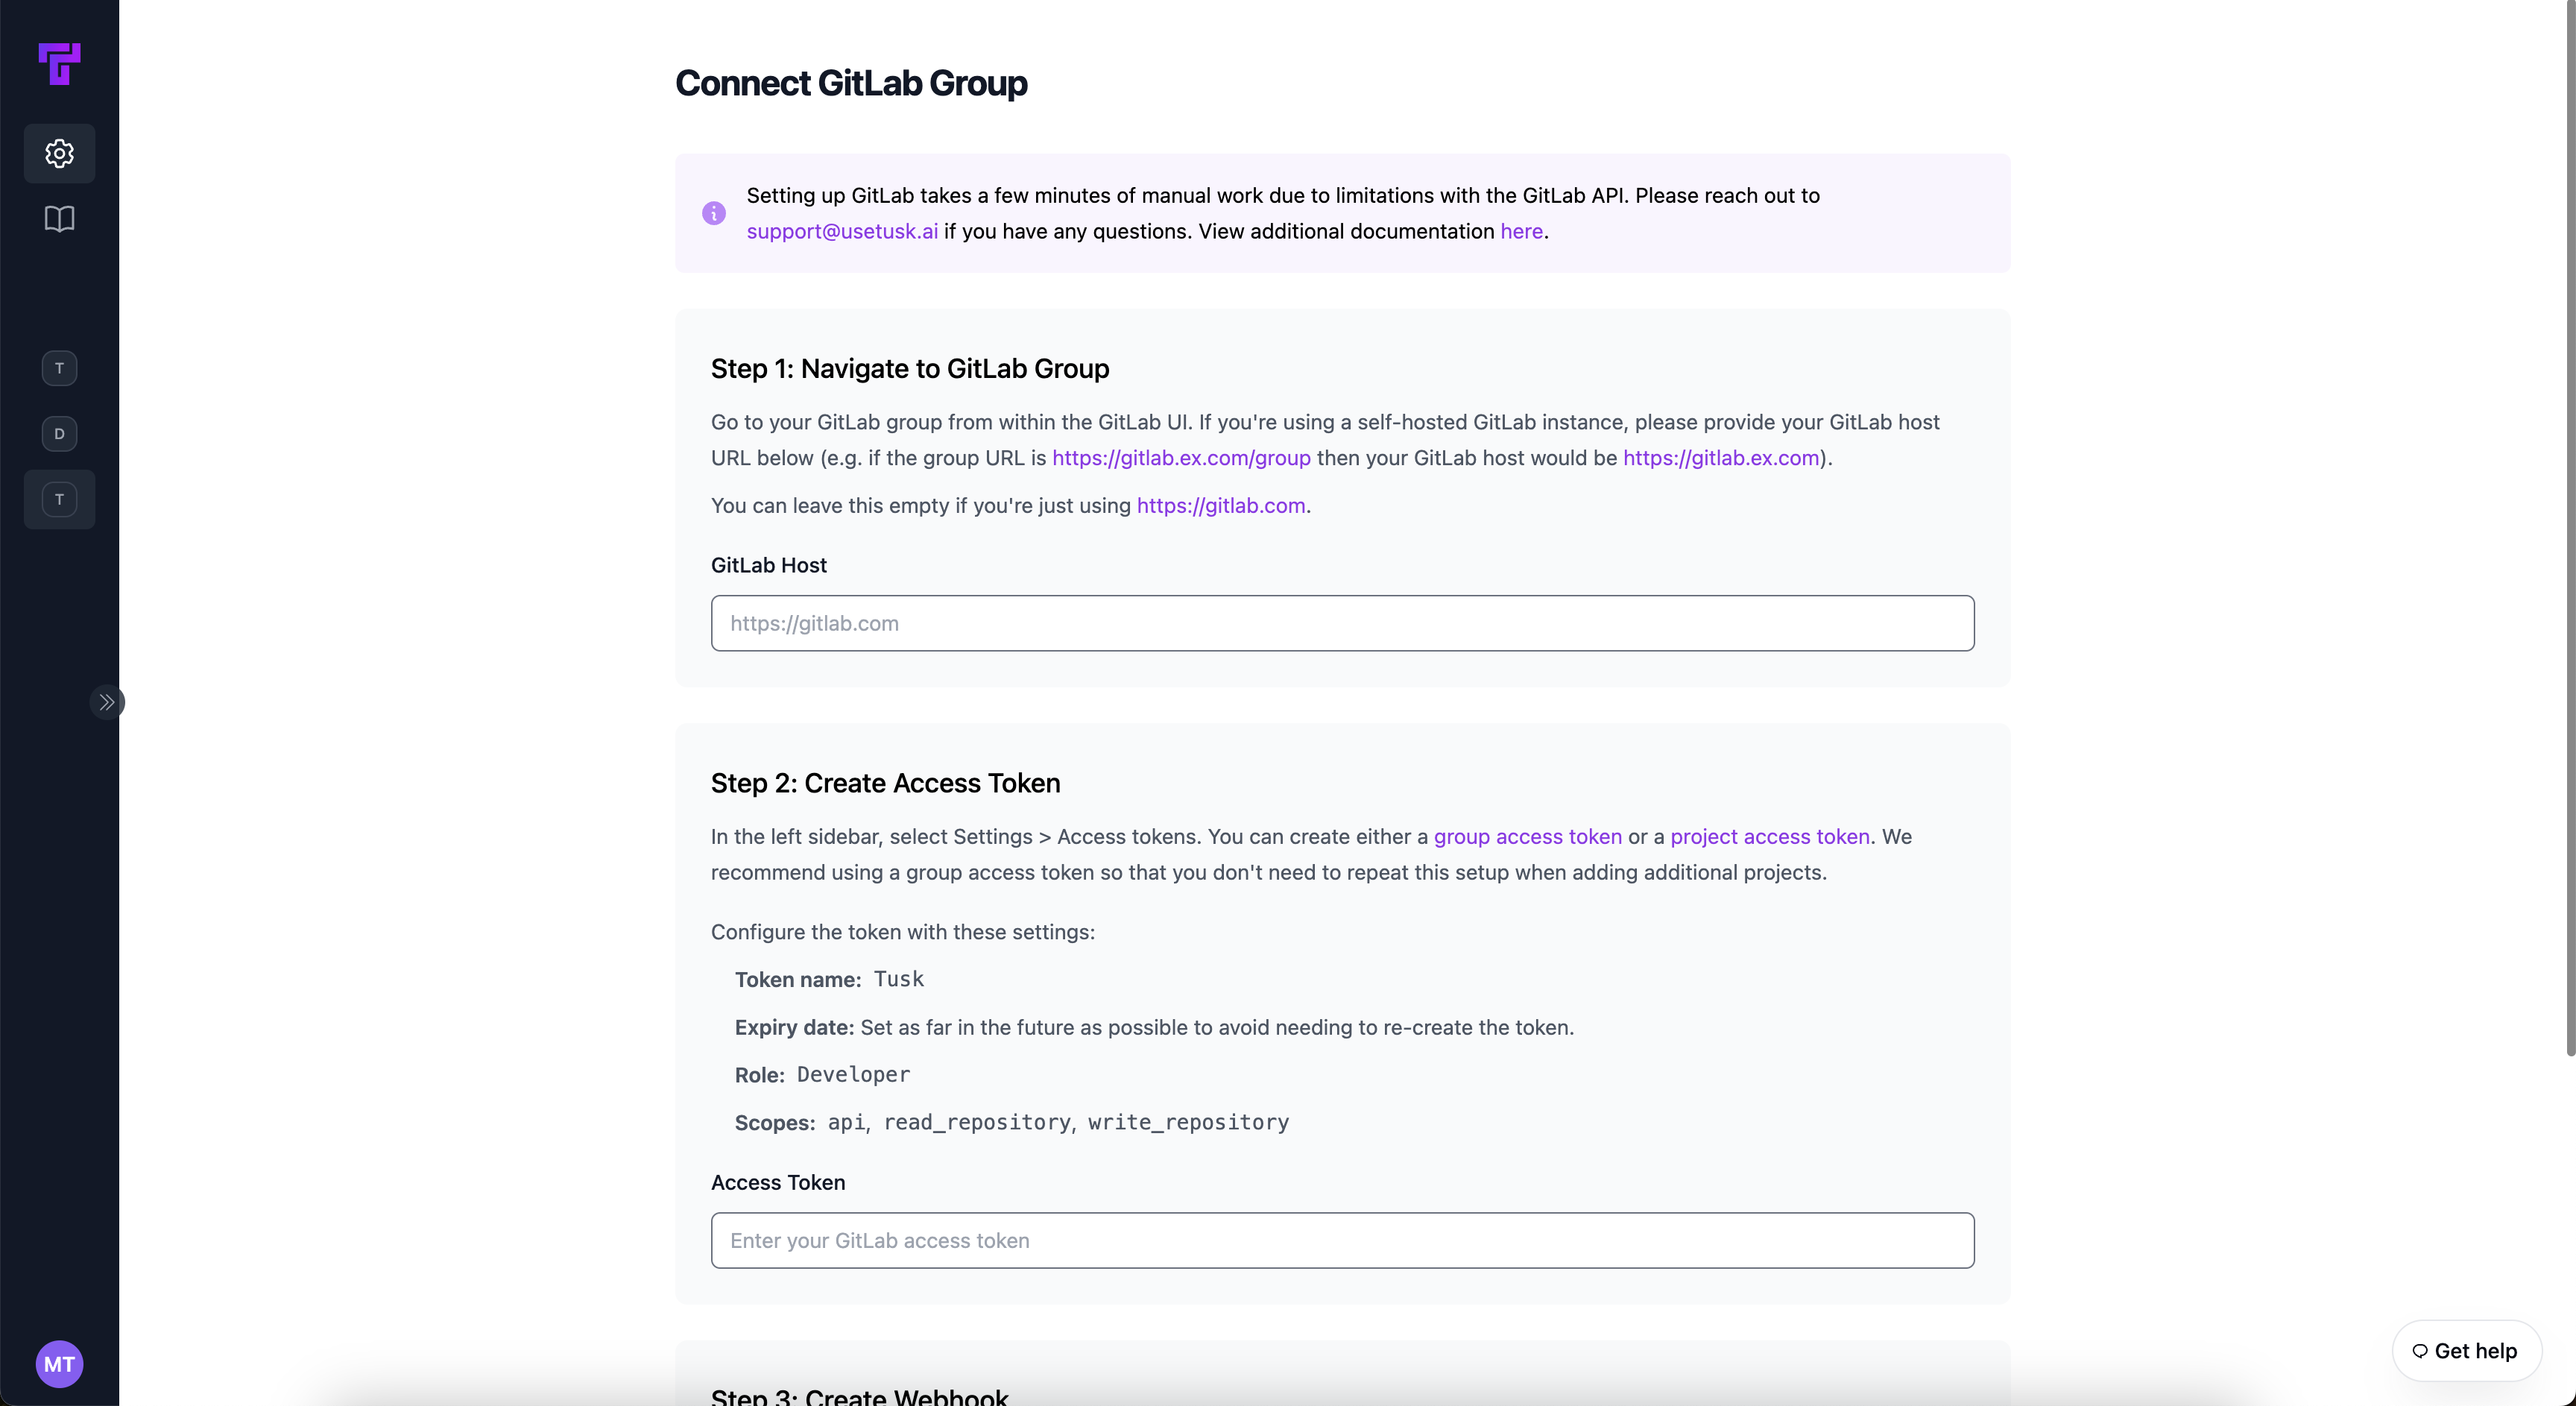
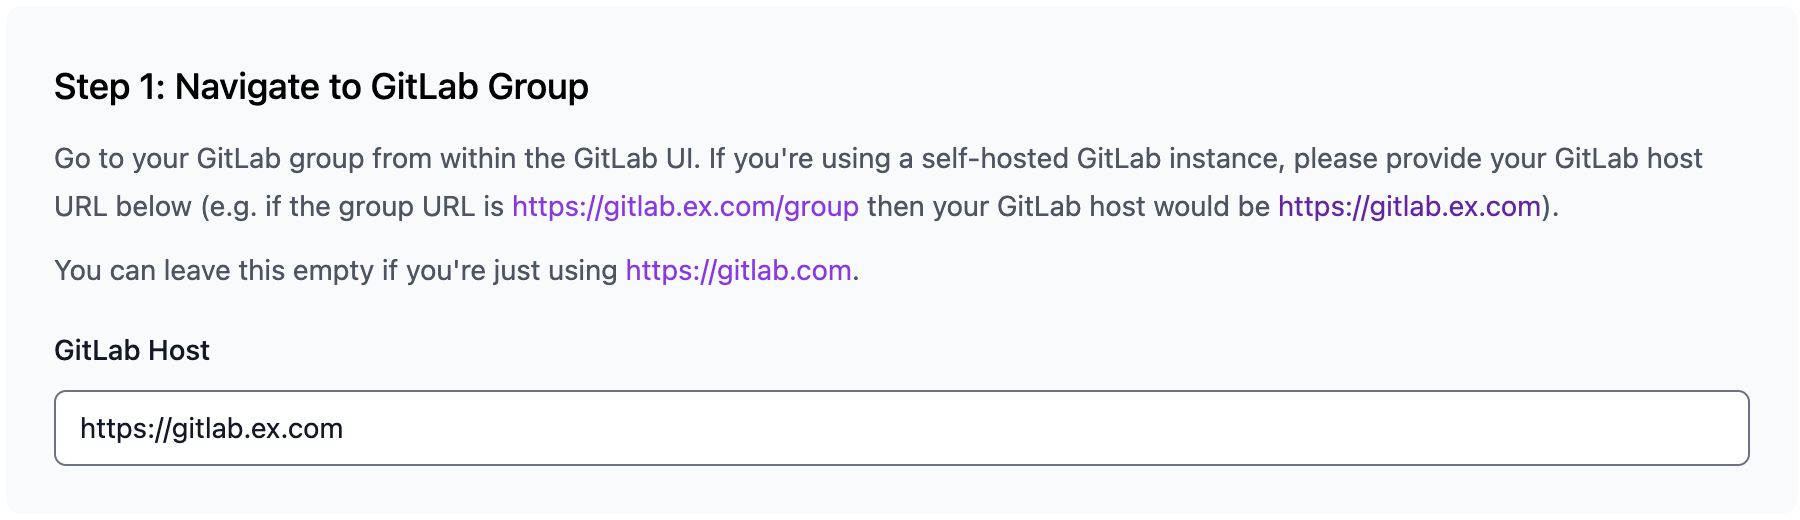
- Connect GitLab
Navigate to Integrations
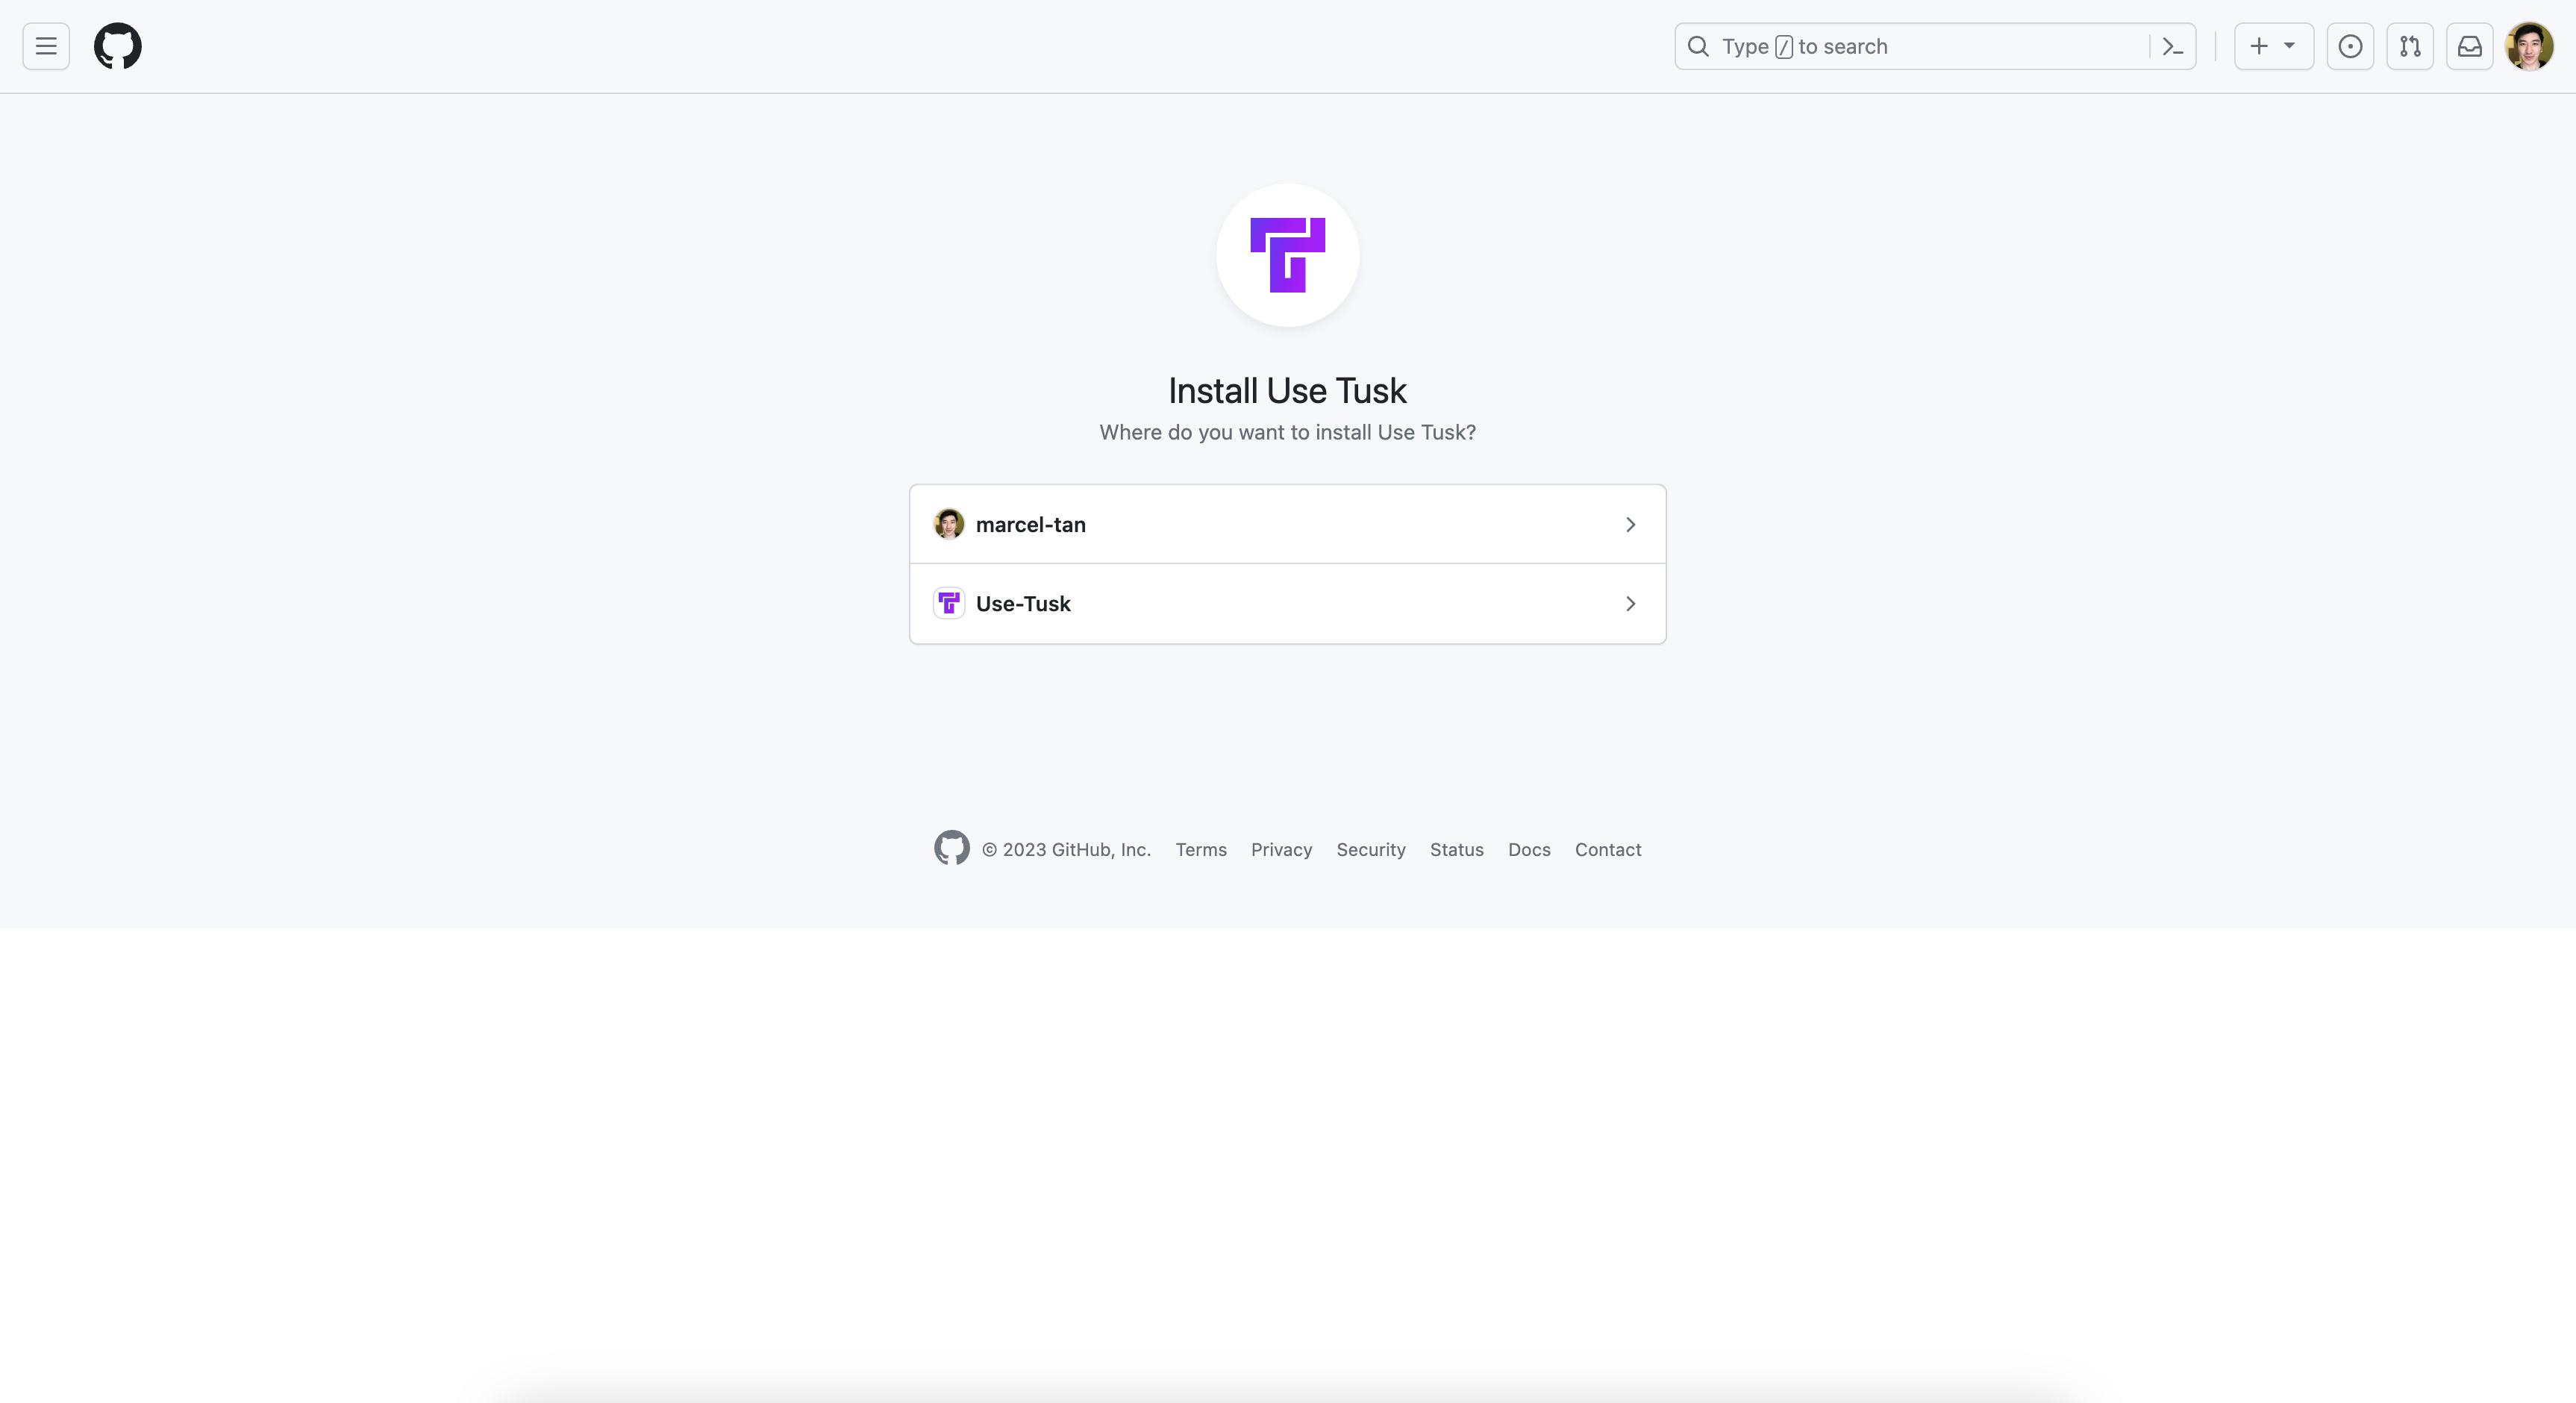
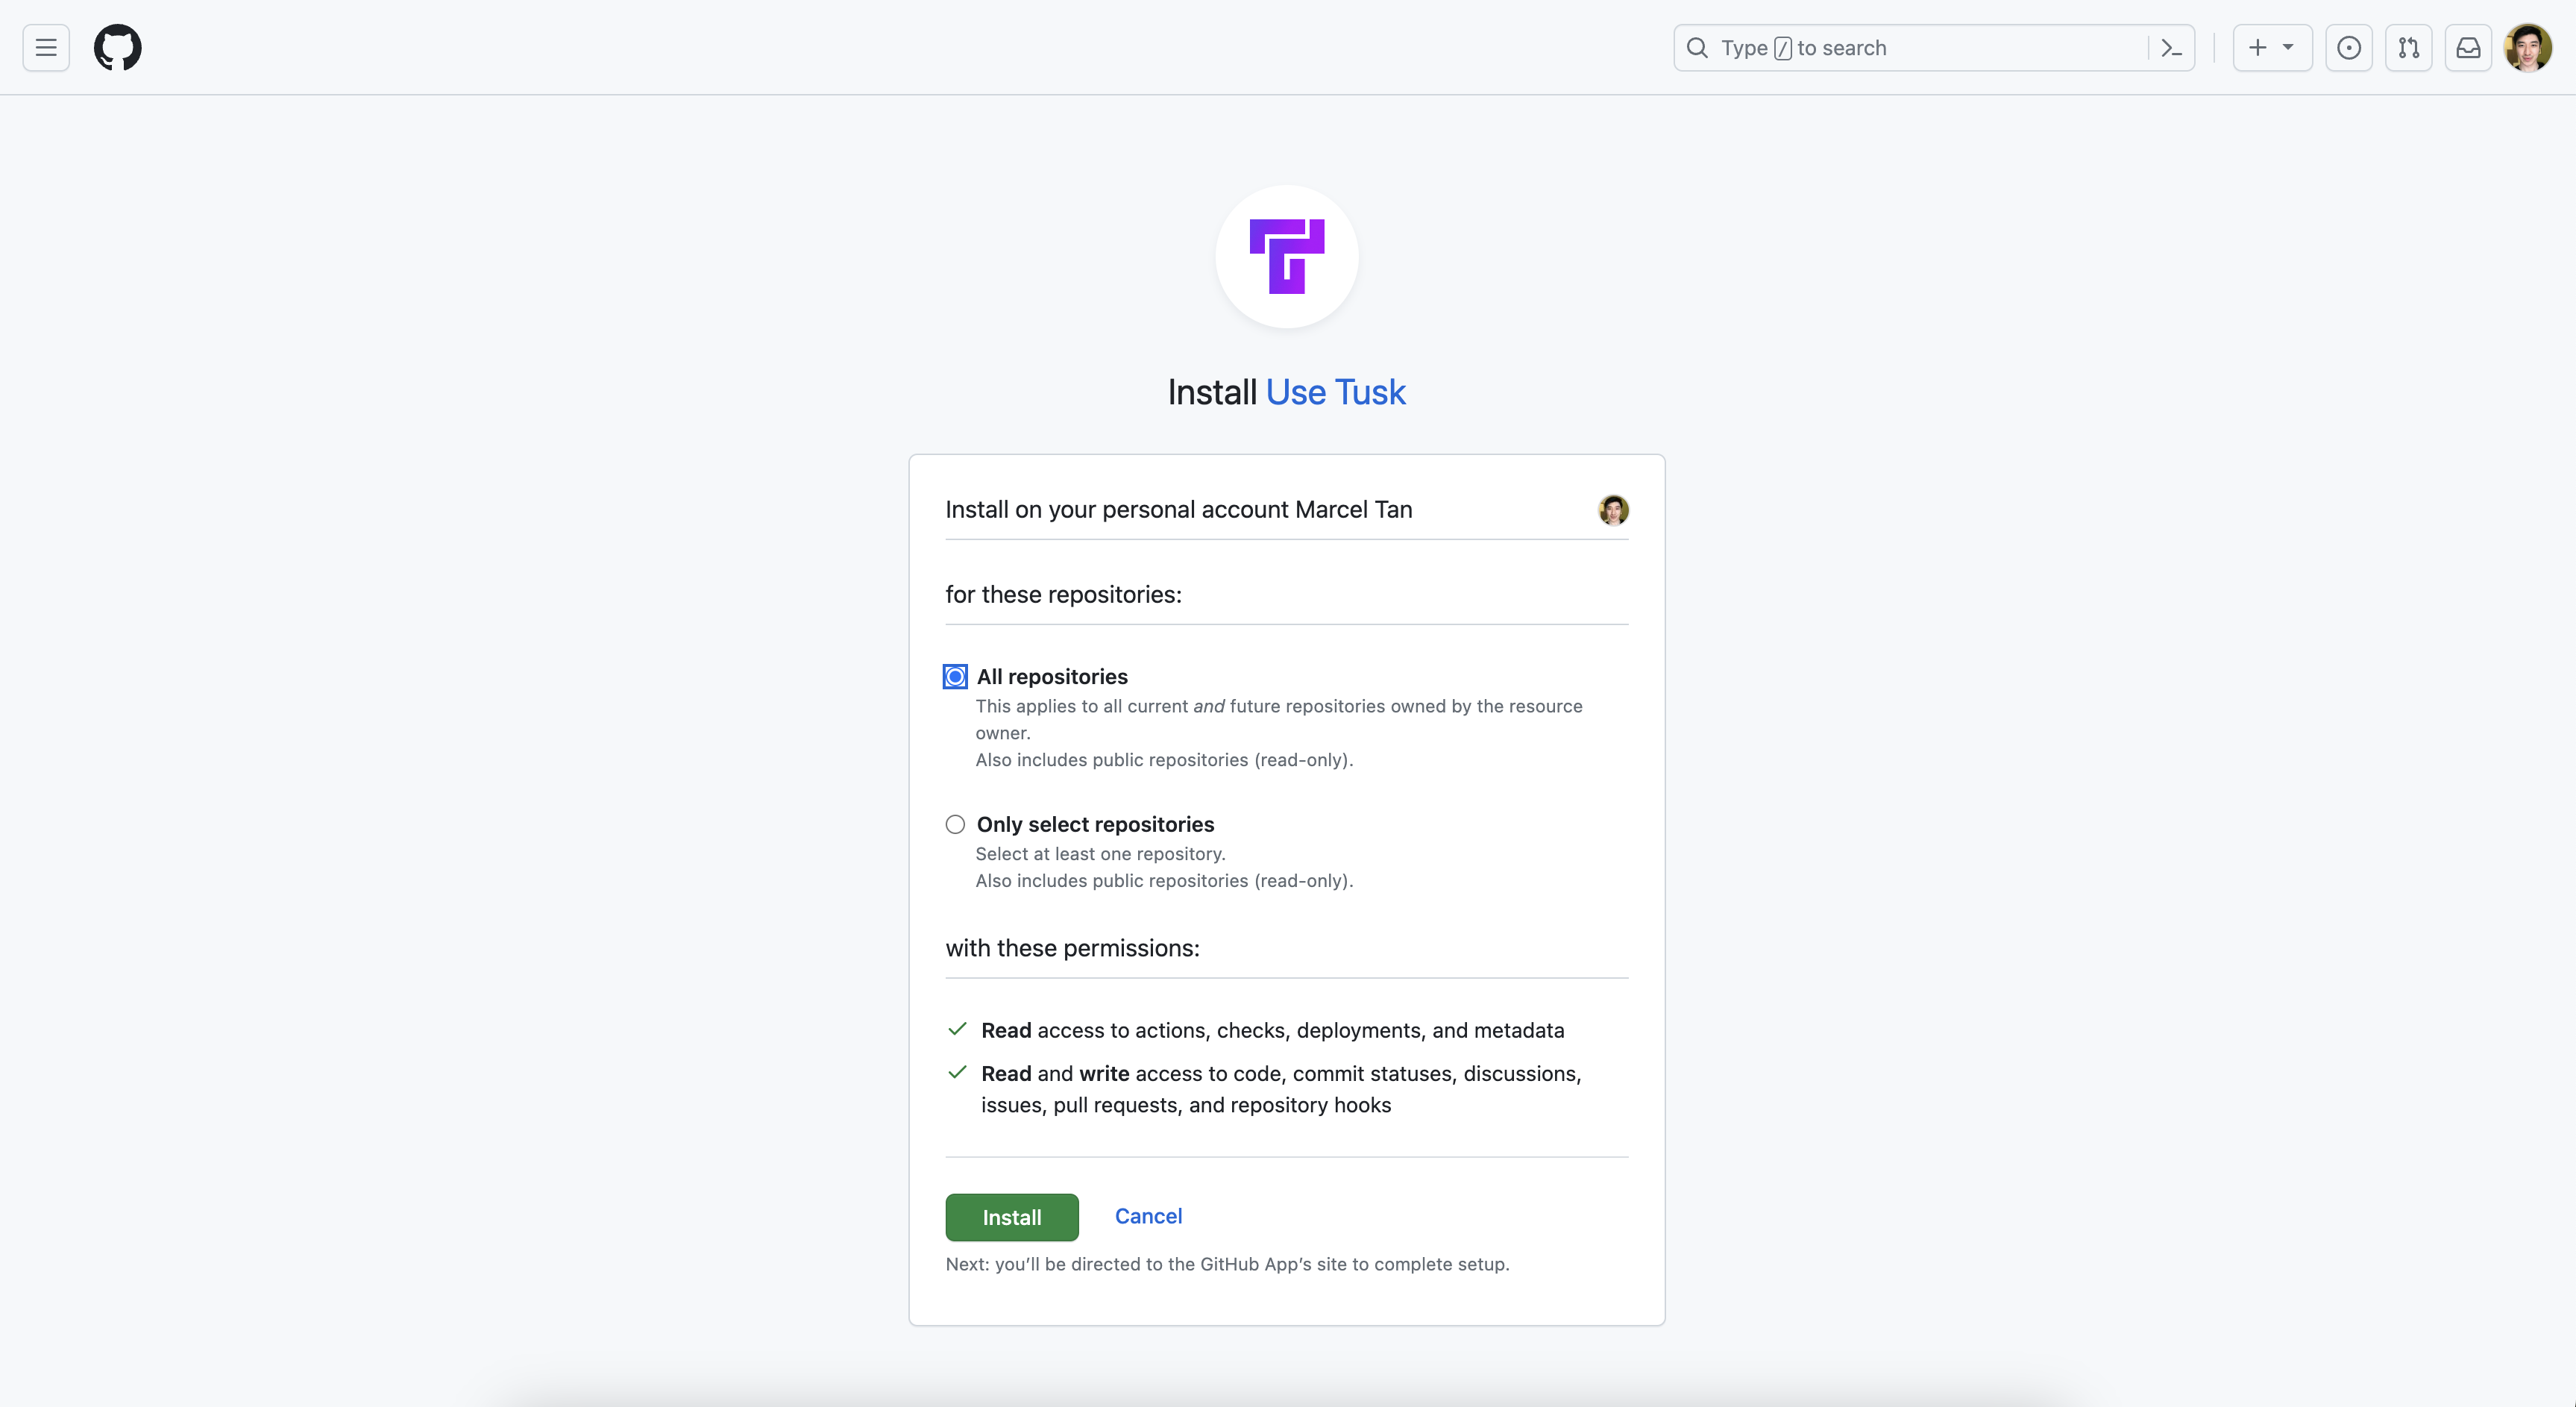
After clicking out of the onboarding modal, you should be in the Integrations page. Click Connect to authorize GitHub.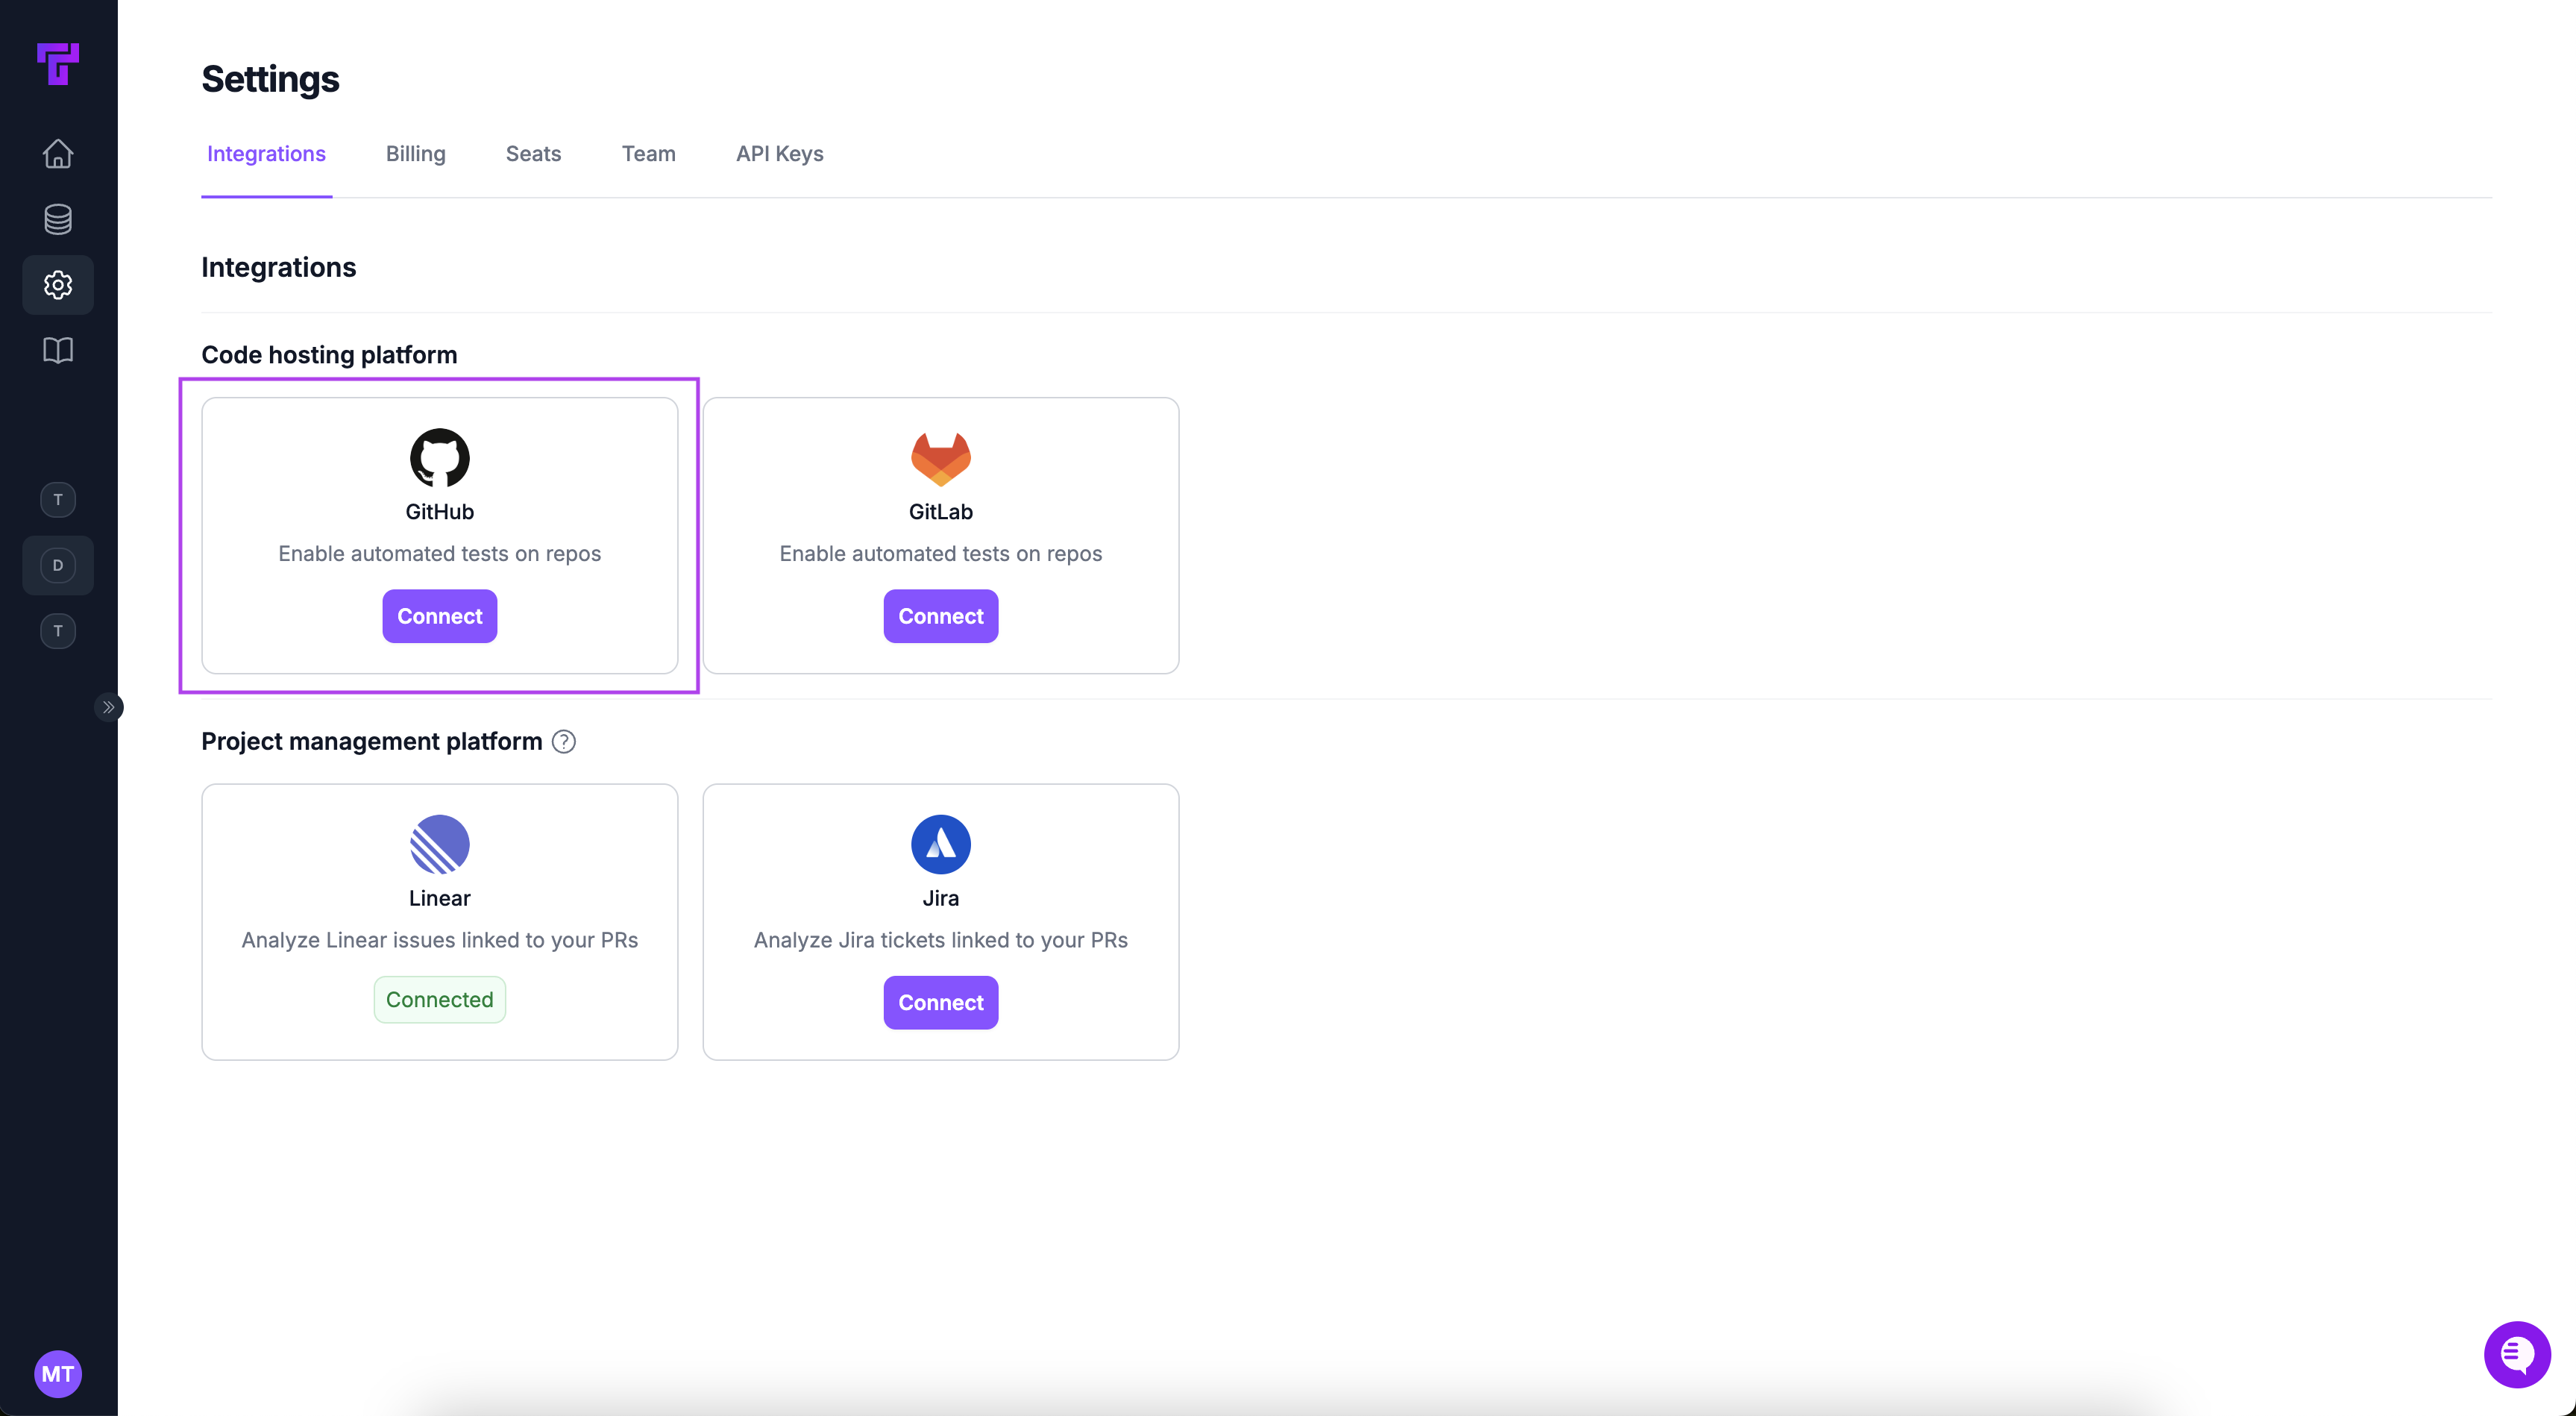


Set up a test execution environment
If you’re only using Tusk for API drift detection or have a white-glove onboarding, please skip this step.
Analyze your repository
Click Analyze Repository to start. Tusk examines your codebase to identify directories containing unit tests, testing frameworks, CI/CD configuration, and potential environment variables needed.This typically takes 2-4 minutes.
Review detected test environments
After analysis, you’ll see a list of potential test environments. For each one, Tusk shows:
- Directory path (for monorepos with multiple services)
- Test framework detected
- CI status - whether tests currently run in CI
- Coverage support - whether Tusk can collect coverage data
Provide environment variables (if detected)
If Tusk detects that environment variables may be required (like NPM tokens for private packages), you’ll be prompted before setup begins.You can:
- Provide values now to ensure setup succeeds on the first try
- Skip for now - Tusk will attempt setup without them and ask again if needed
Wait for configuration
Tusk creates your test execution environment by:
- Creating a Dockerfile (or Docker Compose for projects needing databases/services)
- Writing setup scripts to install dependencies
- Writing test scripts configured for your framework
- Verifying everything works by running your tests
- Iterating if any issues are found
Answer questions (if needed)
During setup, Tusk may ask clarifying questions about your configuration:
- Which test command to use if multiple are available
- How to handle specific dependencies
- Confirmation of environment variable requirements
Need to make changes? You can update any test execution environment at any time. Just describe what you’d like to change and Tusk will modify and re-verify the configuration.See Test Execution Environments for more details on what’s configured and how it works.
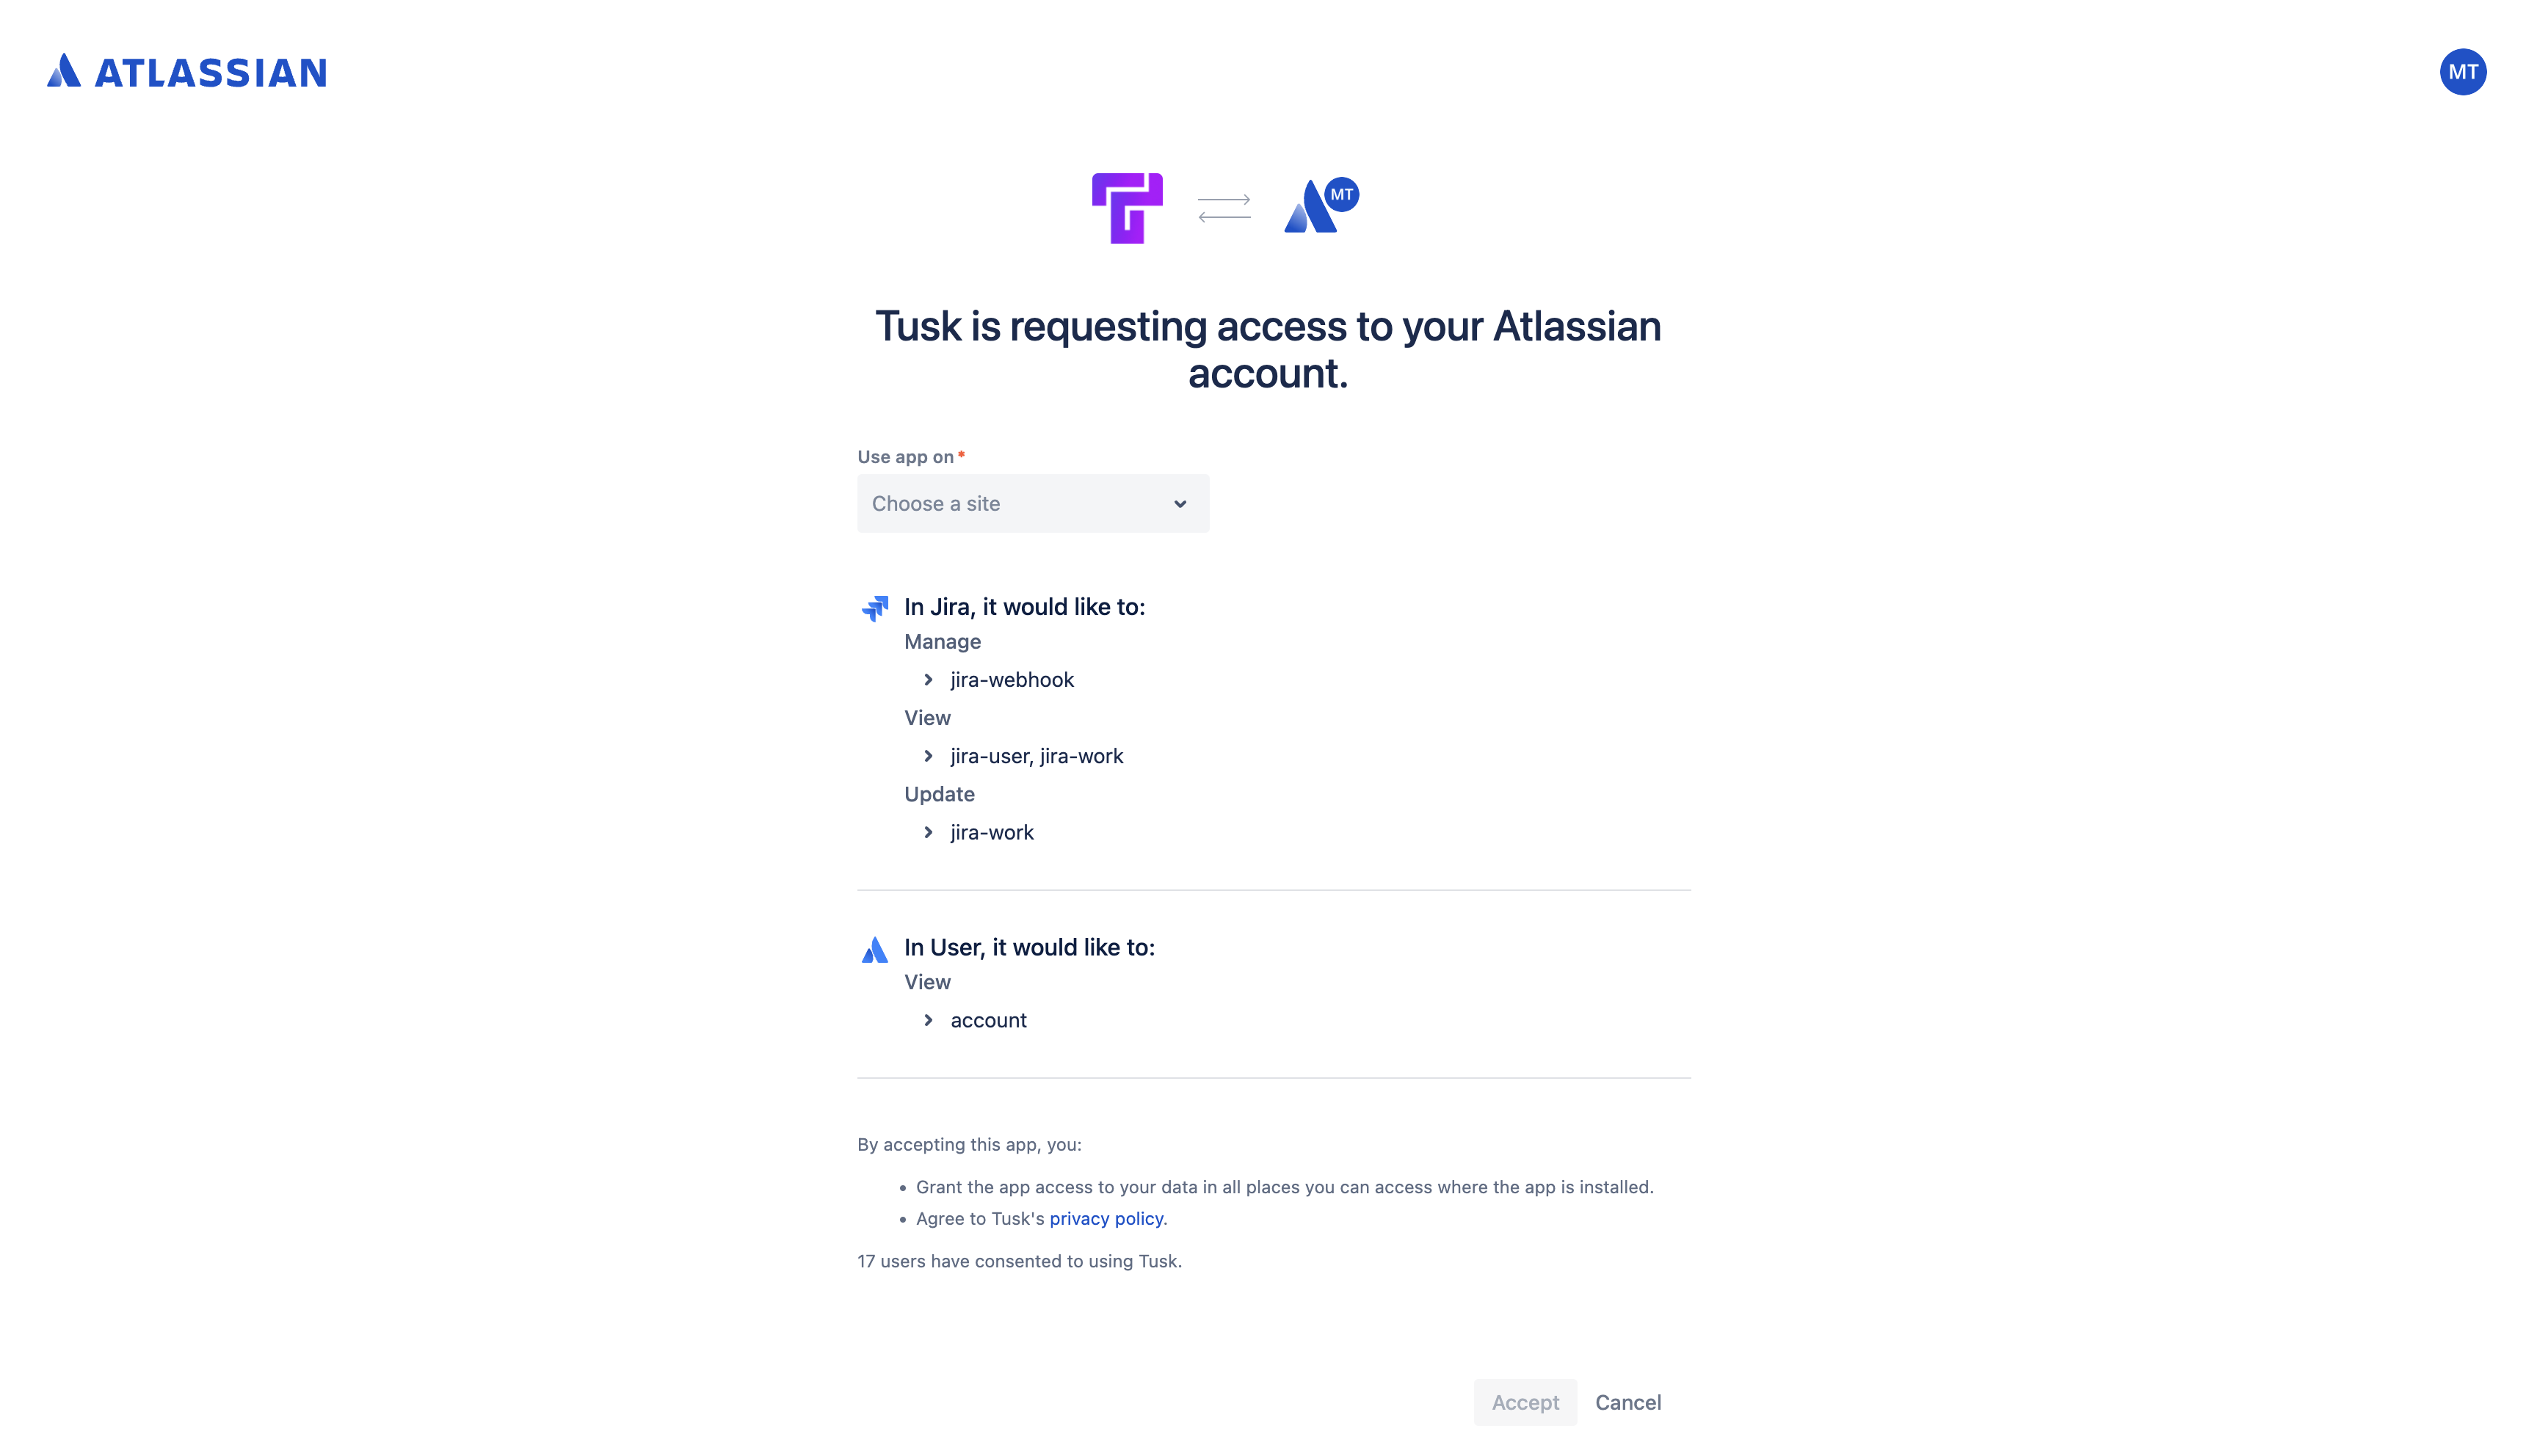
Connect project management platform (optional)
Tusk can use information and business logic from tickets linked to your pull requests to generate more relevant unit tests and classify API deviations more accurately.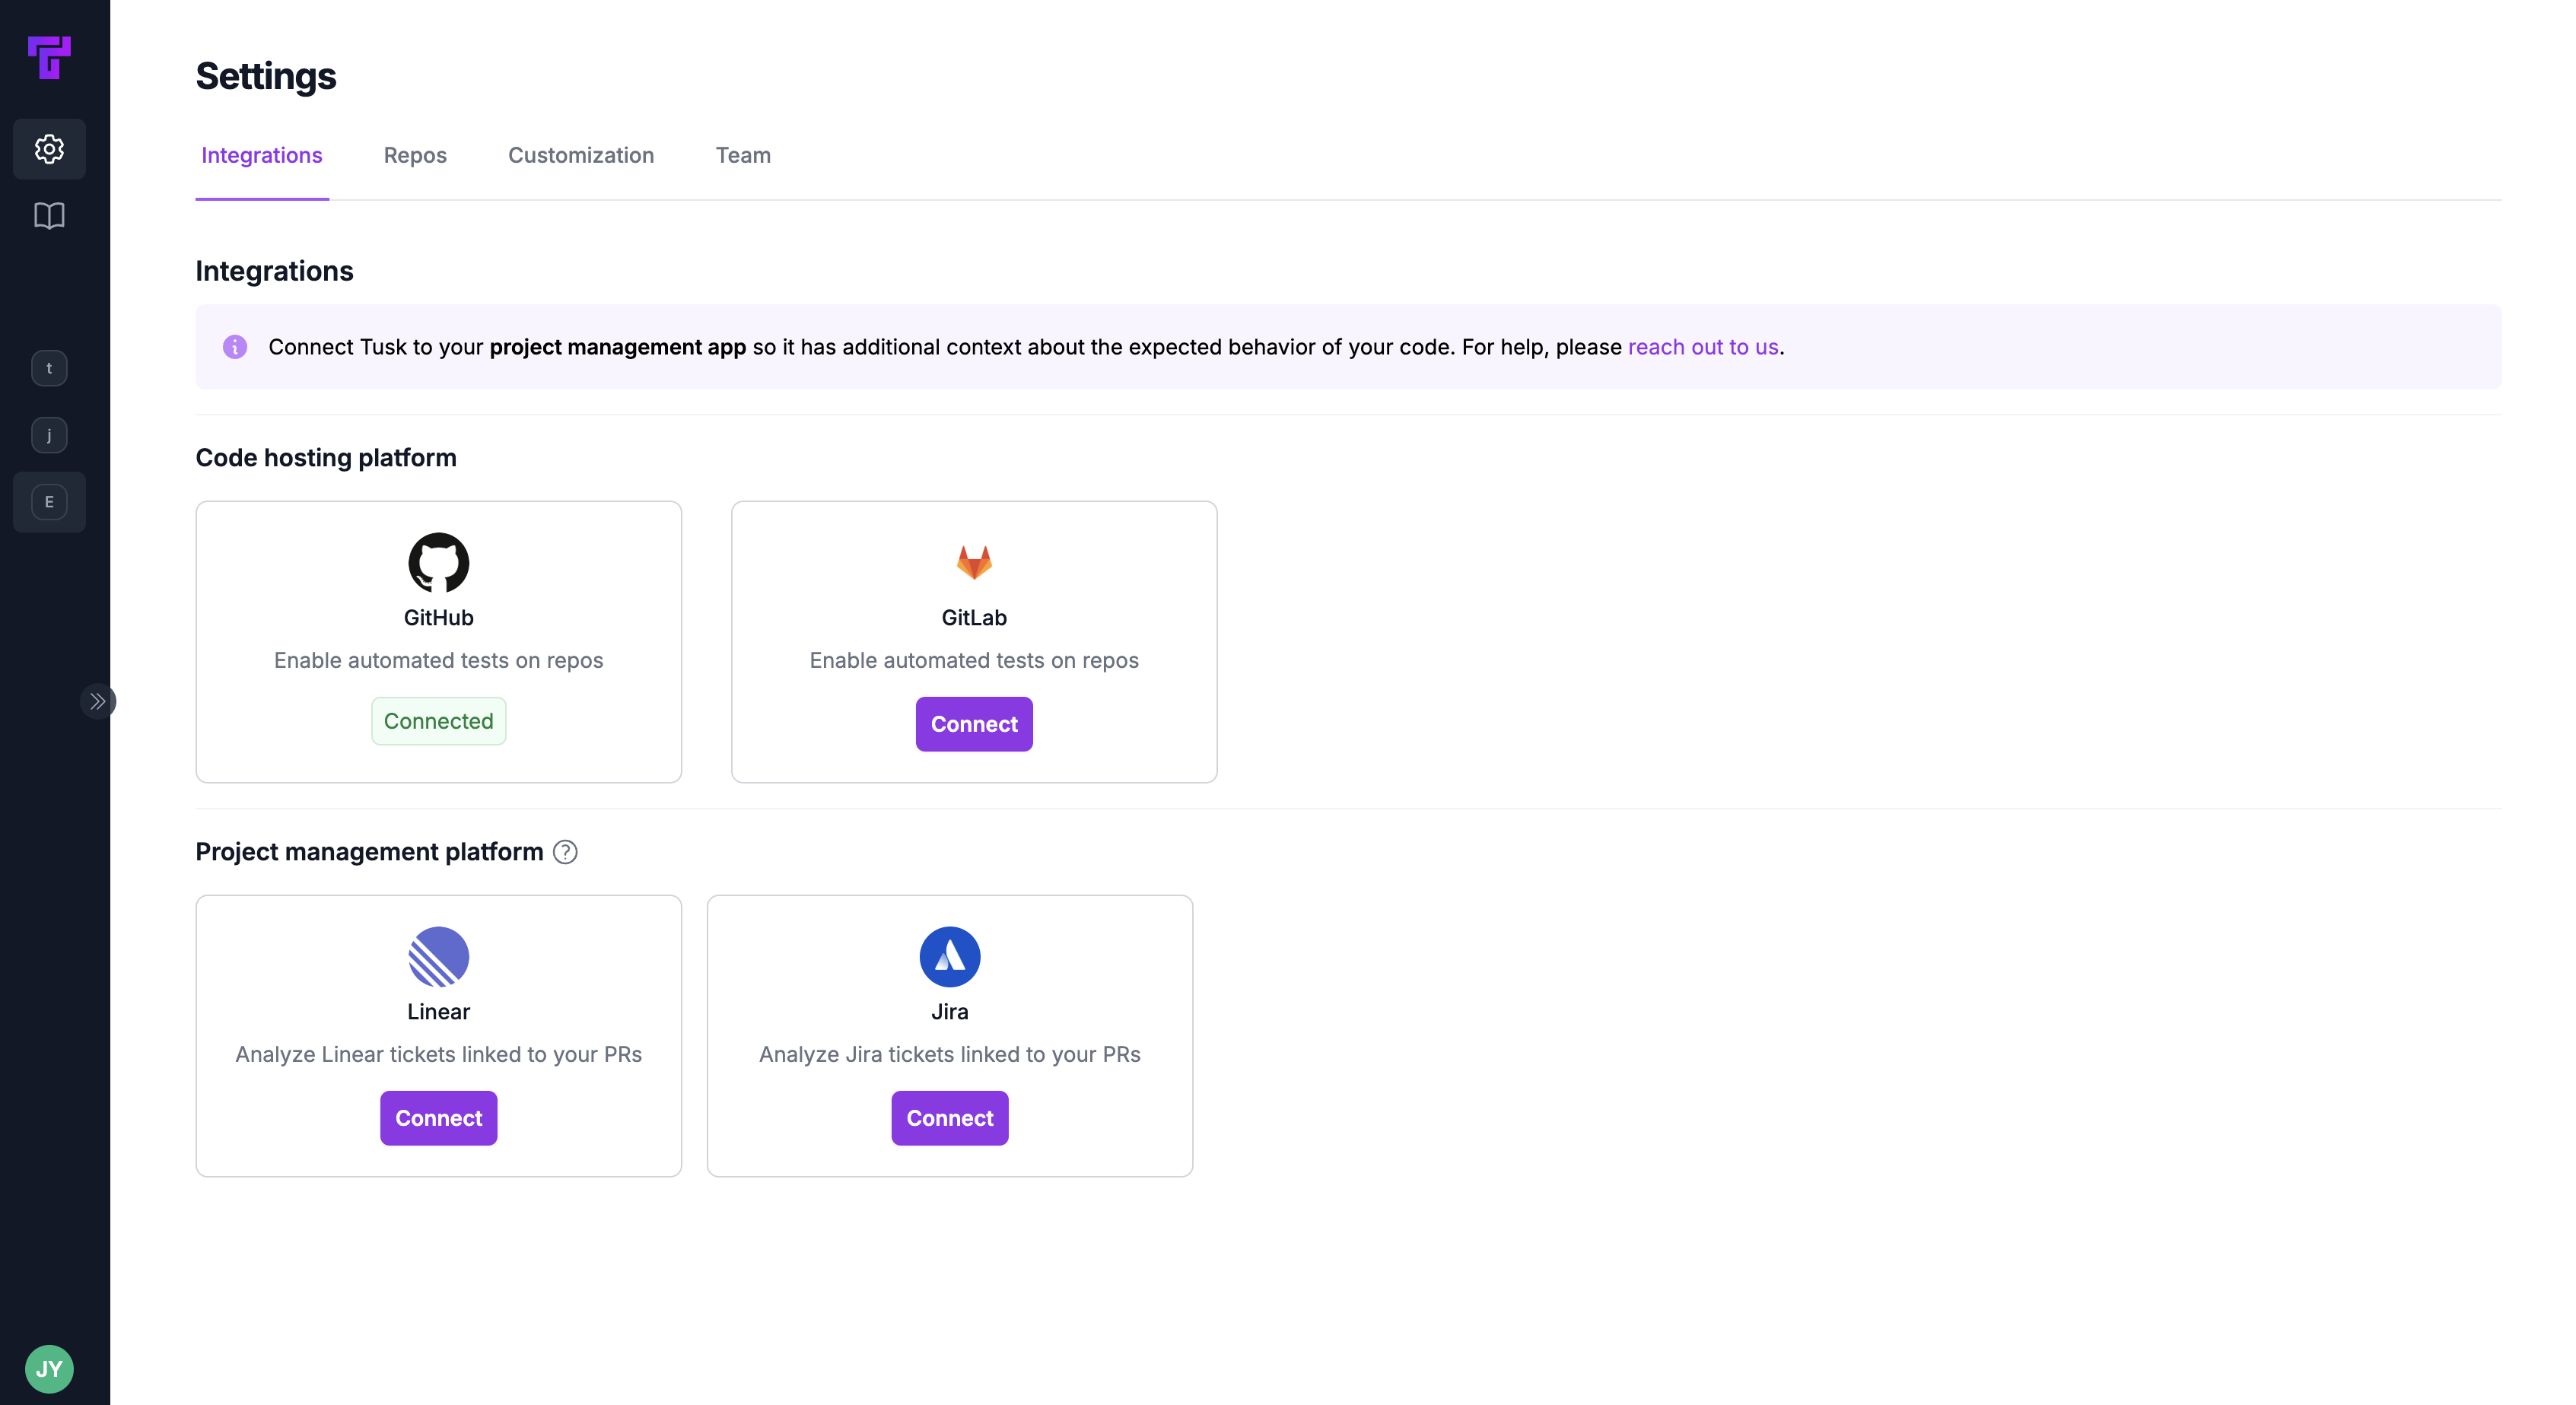
- Connect Linear
- Connect Jira
Connect Linear
Under the Integrations tab, find the Linear integration card under “Project management platform.” Click Connect.
Grant access
You’ll be redirected to the Linear app to grant Tusk access to your Linear workspace. Make sure to choose the correct workspace on the top left corner.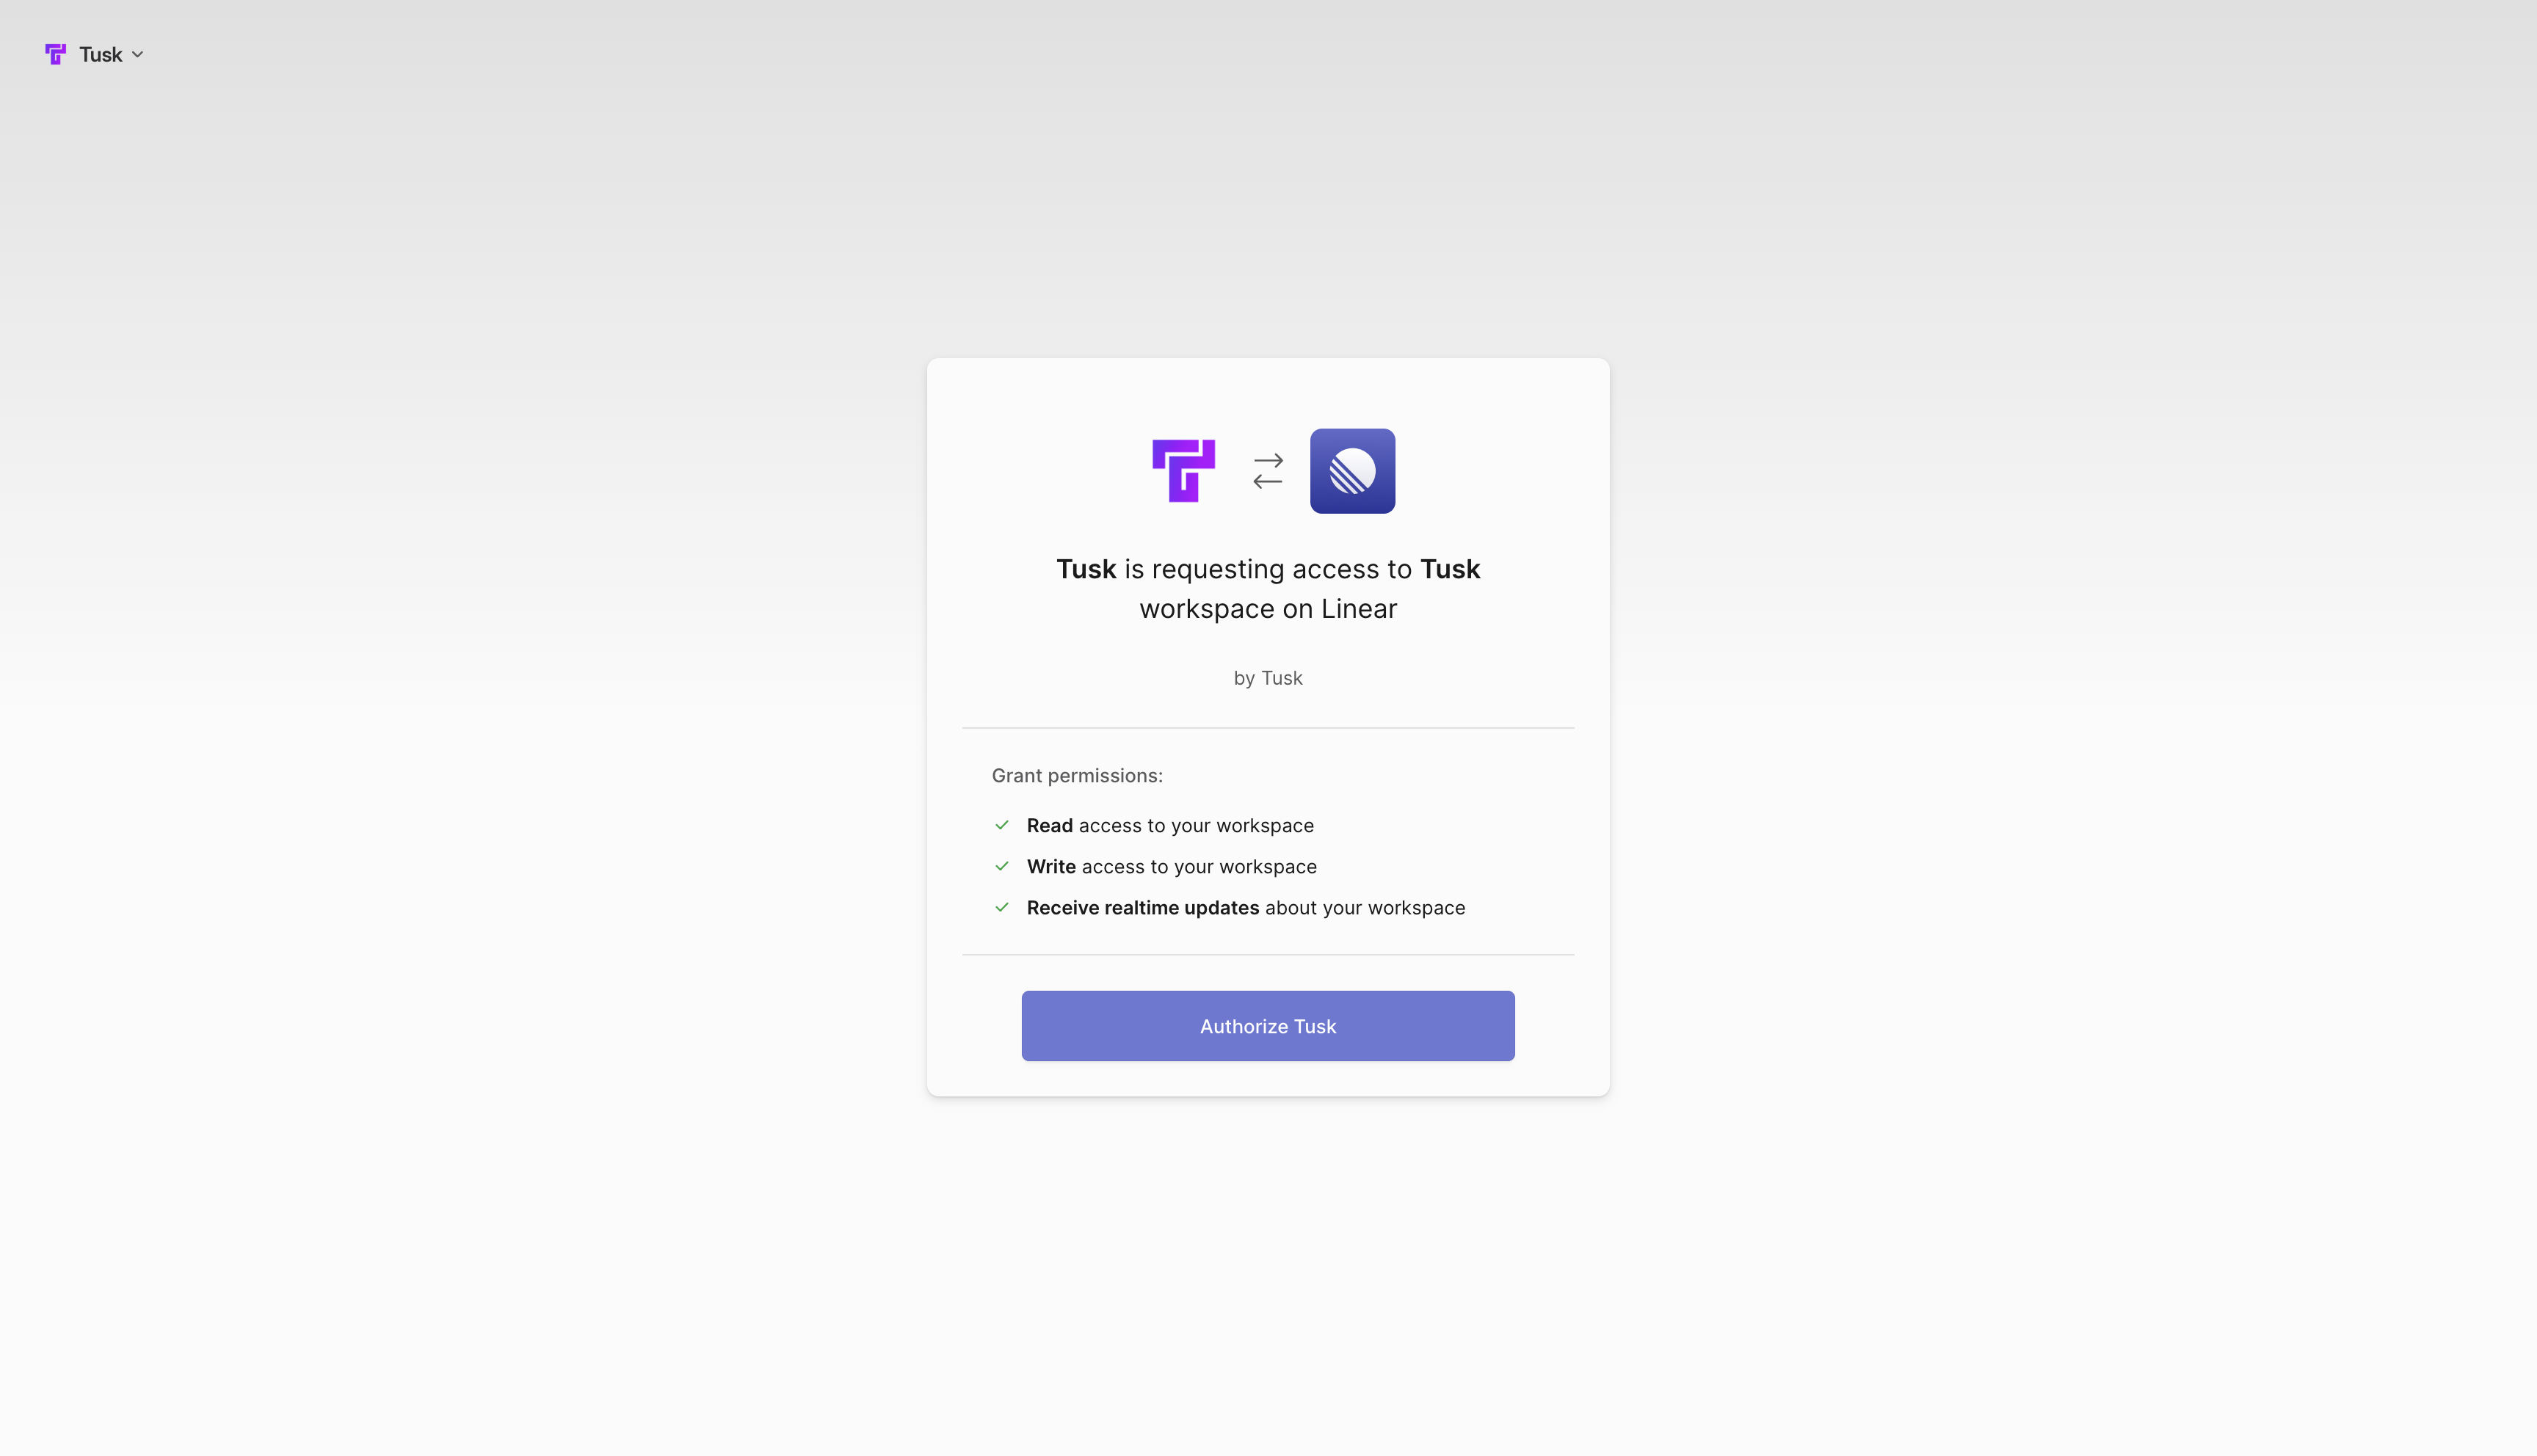

Next Steps
- API Drift Detection: follow this guide to install the Tusk Drift SDK and start recording and replaying your first test.
- Unit Test Generation: follow this guide to raise an example PR and watch Tusk generate unit tests to cover your changes.
FAQs
What happens if test environment setup fails?
What happens if test environment setup fails?
If setup encounters an issue it can’t resolve automatically, you’ll see a “Failed” status with details about what went wrong. You can:
- Review the error - Click into the environment to see the specific failure
- Provide missing information - Often failures are due to missing environment variables or unclear configuration
- Retry setup - After addressing the issue, click Retry to start again
- Contact support - For complex issues, reach out to support@usetusk.ai
How do I update an existing test environment configuration?
How do I update an existing test environment configuration?
You can update any test execution environment at any time:
- Go to the Unit Tests page and click on your repository
- Select the Test Execution Environments tab
- Click on the environment you want to modify
- Click Update and describe what you’d like to change
Can I have multiple test environments for a monorepo?
Can I have multiple test environments for a monorepo?
Yes! During repository analysis, Tusk identifies each directory that contains tests. You can set up separate test execution environments for each service or package in your monorepo.Each environment has its own Dockerfile, scripts, and configuration - they run independently when Tusk generates tests for changes in that directory.
How do I connect additional repos to Tusk?
How do I connect additional repos to Tusk?
Make sure the additional repo(s) are in the same GitHub organization. If not, see the frequently asked question below this one.
If you’ve already given Tusk access to the repo in GitHub, follow these steps:
- Go to Connected Repos in the Tusk web app
- Click Sync connected repos
- Go to the Unit Tests page
- Click Enable to sync the additional repo(s)
I still don't see my other repos in the same organization. What's happening?
I still don't see my other repos in the same organization. What's happening?
You most likely gave Tusk access to “Only select repositories” on initial GitHub connection.
- In GitHub itself, go to Settings > GitHub Apps for the current organization (github.com/organizations/your-org-name/settings/installations)
- Click Configure for “Use Tusk”
- Under Repository access, click Select repositories
- Select the additional repo(s) from the dropdown menu
- Click Save
- In Tusk, go to Connected Repos and click Sync connected repos
- Go to the Unit Tests page
- Click Enable to sync the additional repo(s)
How do I connect another GitHub organization to Tusk?
How do I connect another GitHub organization to Tusk?
- In GitHub itself, go to Settings > GitHub Apps for the current organization (github.com/organizations/your-org-name/settings/installations)
- Click Configure for “Use Tusk”
- Click Uninstall in the “Danger zone”
- Return to the Tusk web app’s settings
- Click Connect on the GitHub integration
- Select the new GitHub organization to authorize Tusk on
How do I disconnect my GitHub organization from Tusk?
How do I disconnect my GitHub organization from Tusk?
- In GitHub itself, go to Settings > GitHub Apps for the current organization (github.com/organizations/your-org-name/settings/installations)
- Click Configure for “Use Tusk”
- Click Uninstall in the “Danger zone”
How does Tusk run the tests it generates?
How does Tusk run the tests it generates?
Tusk runs generated tests in isolated, ephemeral sandboxes using your test execution environment configuration. When you set up a test environment, Tusk creates a Docker-based sandbox specifically configured for your project’s dependencies and testing framework.This allows Tusk to:
- Verify that generated tests actually pass
- Auto-iterate on test cases if errors are encountered
- Show you test results before you incorporate them into your codebase